Name of Project: Collage-Hatching Portraits
Grade Level or Age of Participant: 10th-12th grade
School, Teacher and Classroom: De La Salle High School, Megan Longman, Honors Art
MCAD Teaching Artist: Roman Feldhahn
Number of Students: 24
VISUAL ARTS CONTENT OR STANDARDS
Grades 9-12
Artistic Foundations
1. Demonstrate knowledge and use of the technical skills of the art form, integrating technology when applicable.
Visual Arts 9.1.2.5.1
1. Integrate the characteristics of the tools, materials and techniques of a selected media in original artworks to support artistic purposes.
OVERVIEW OF PROJECT
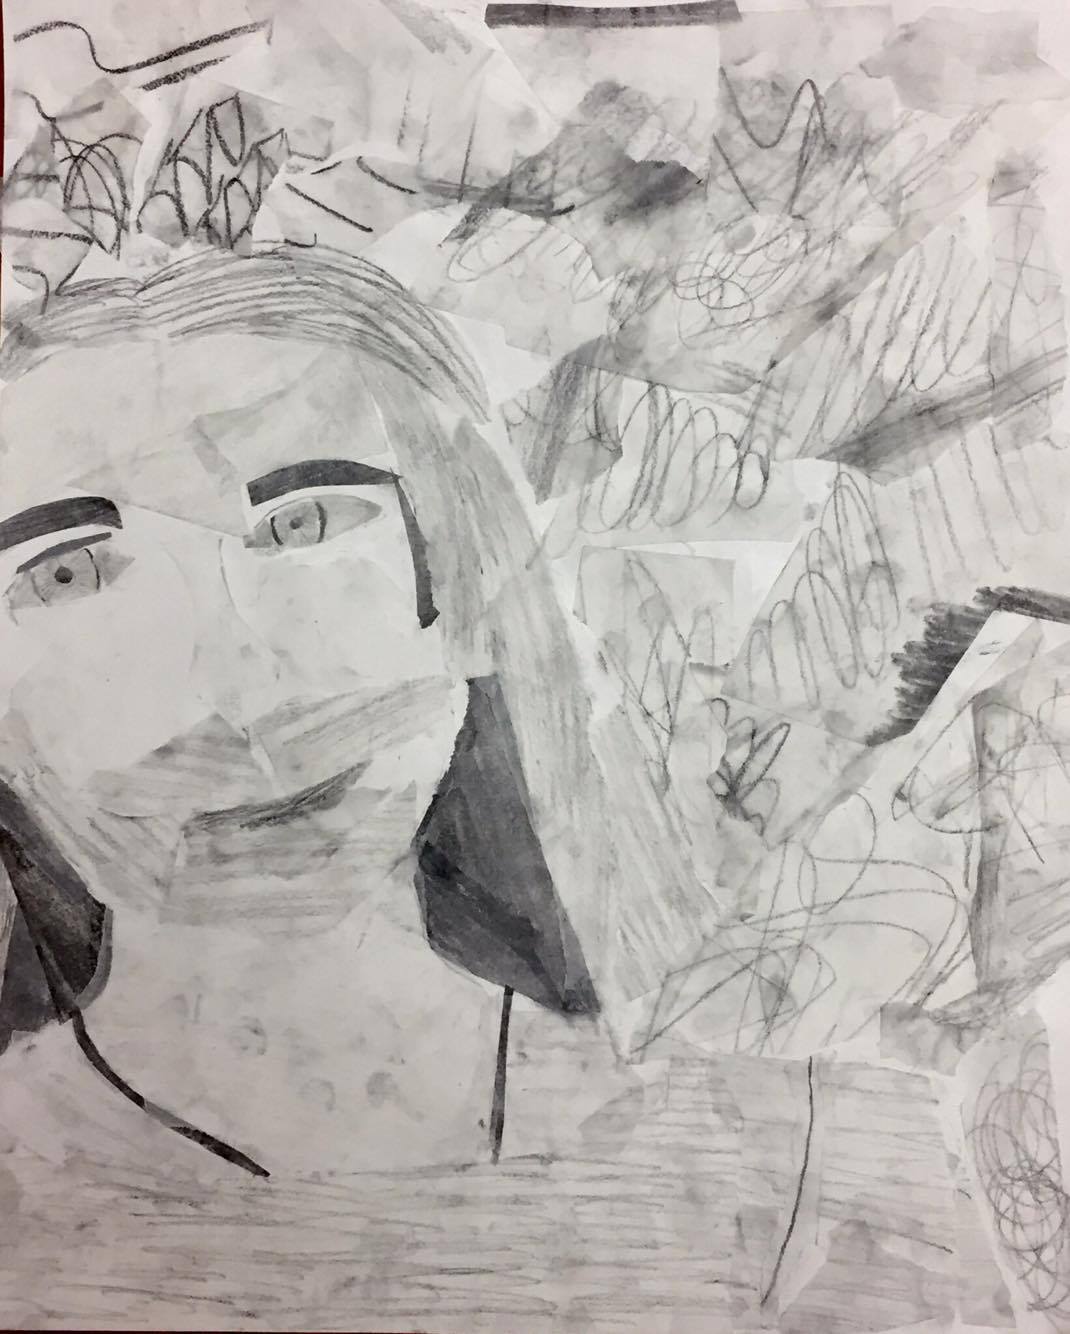
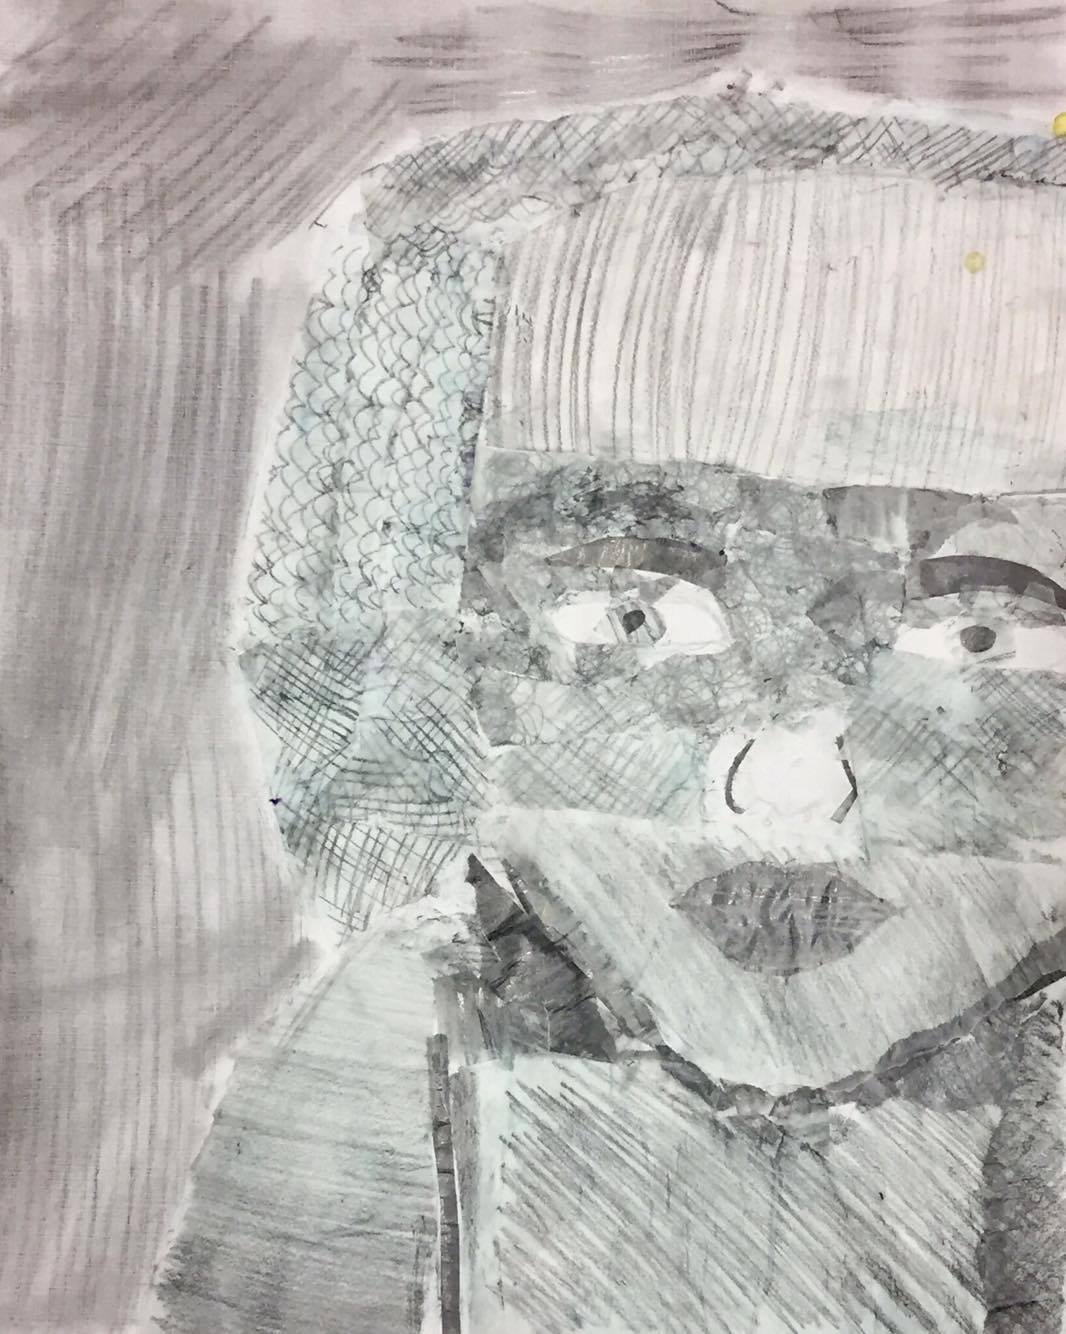
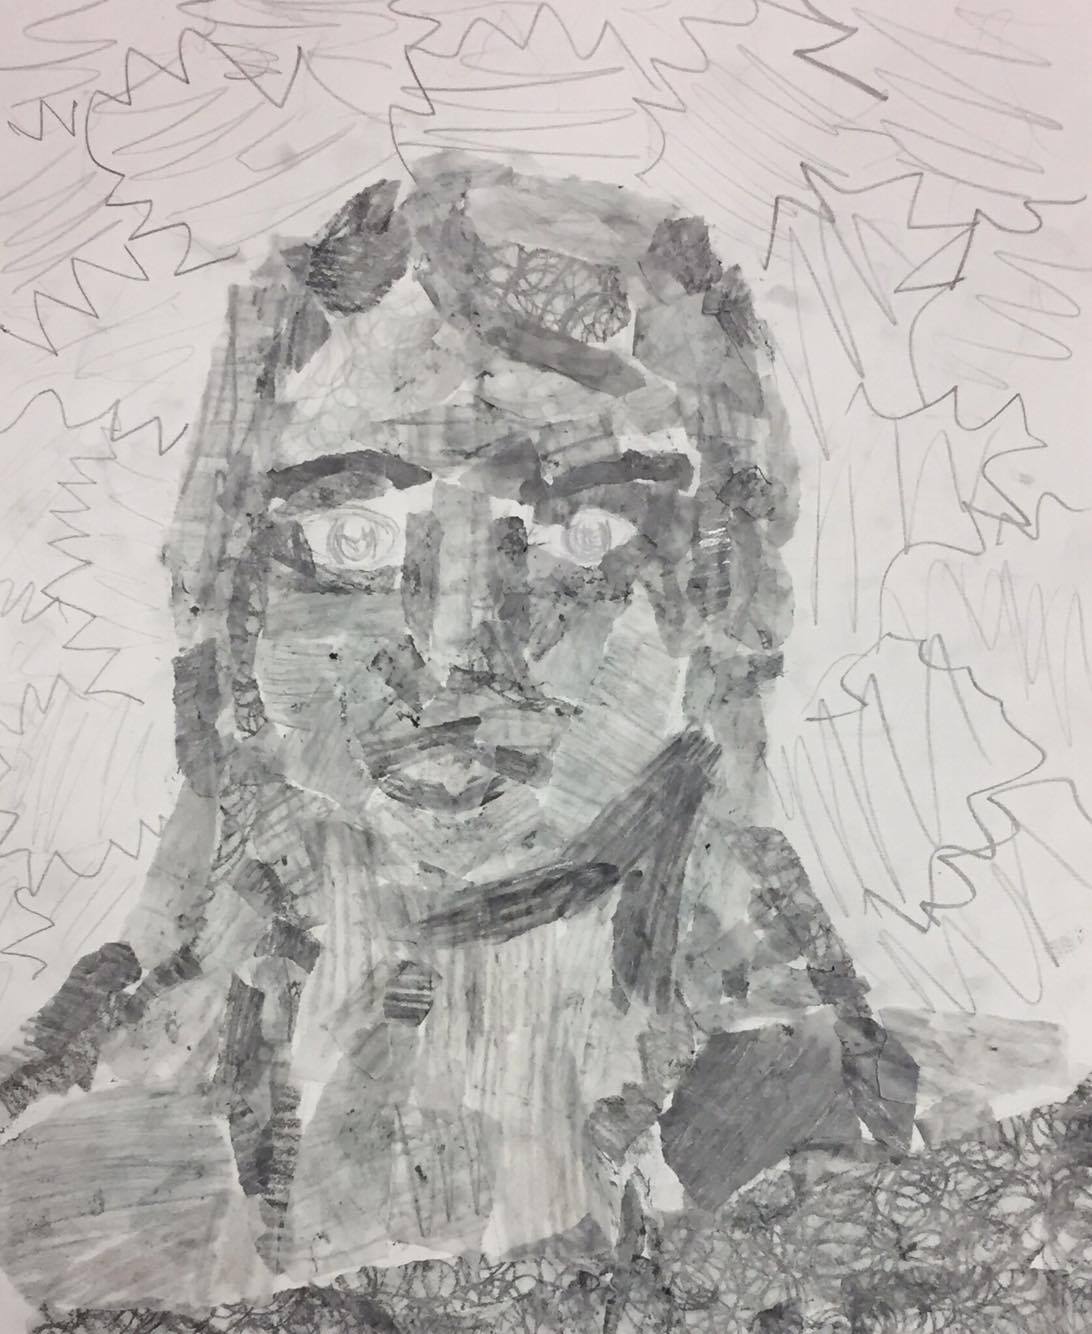
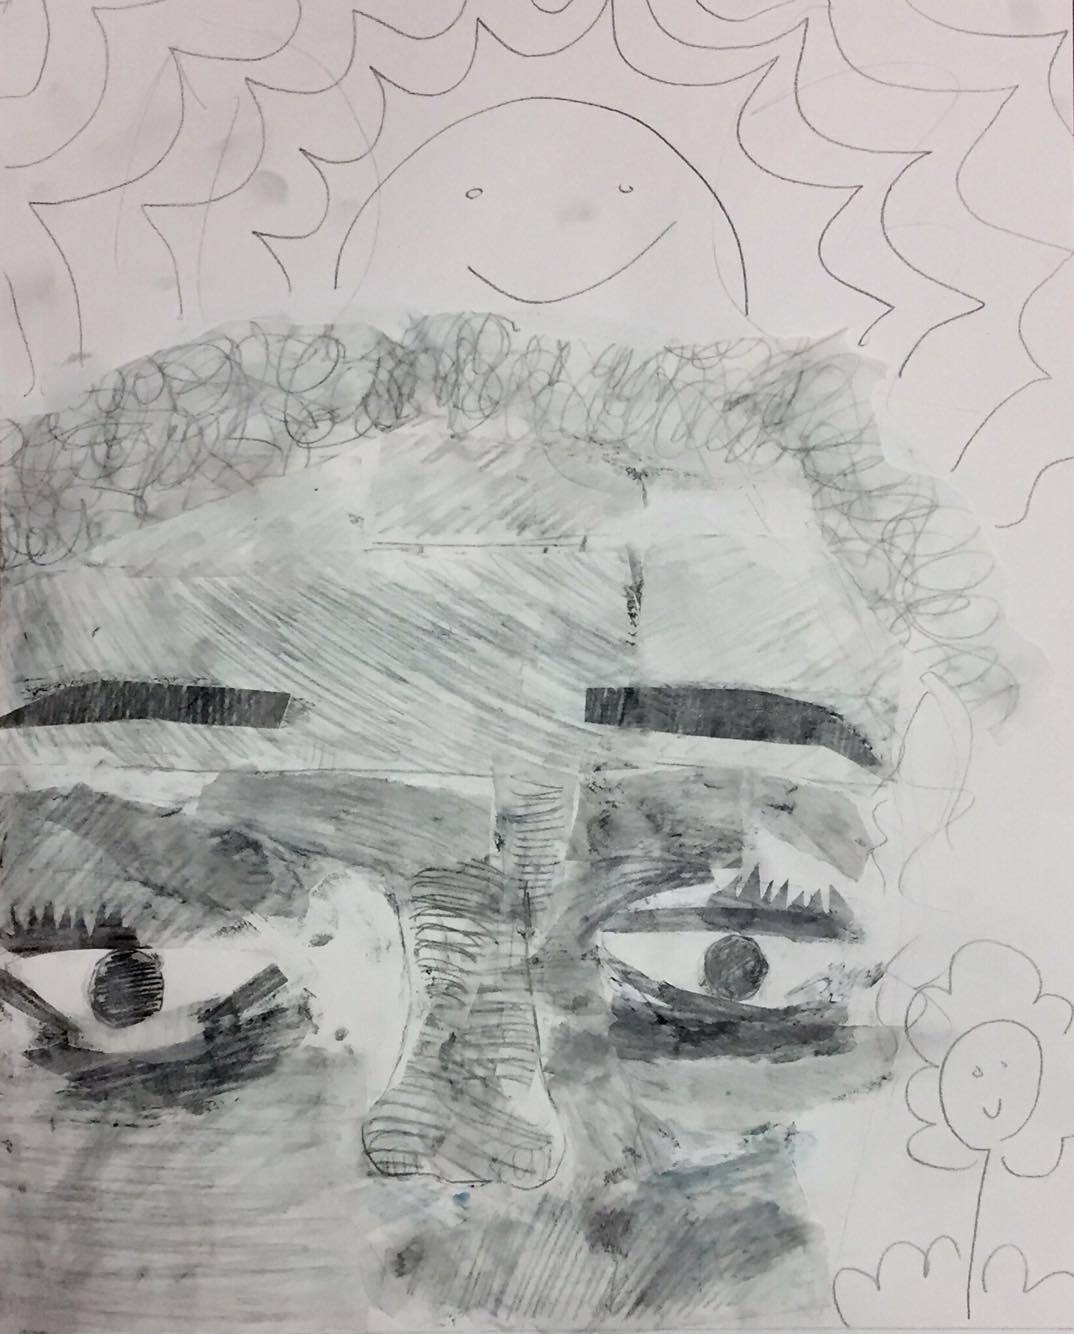
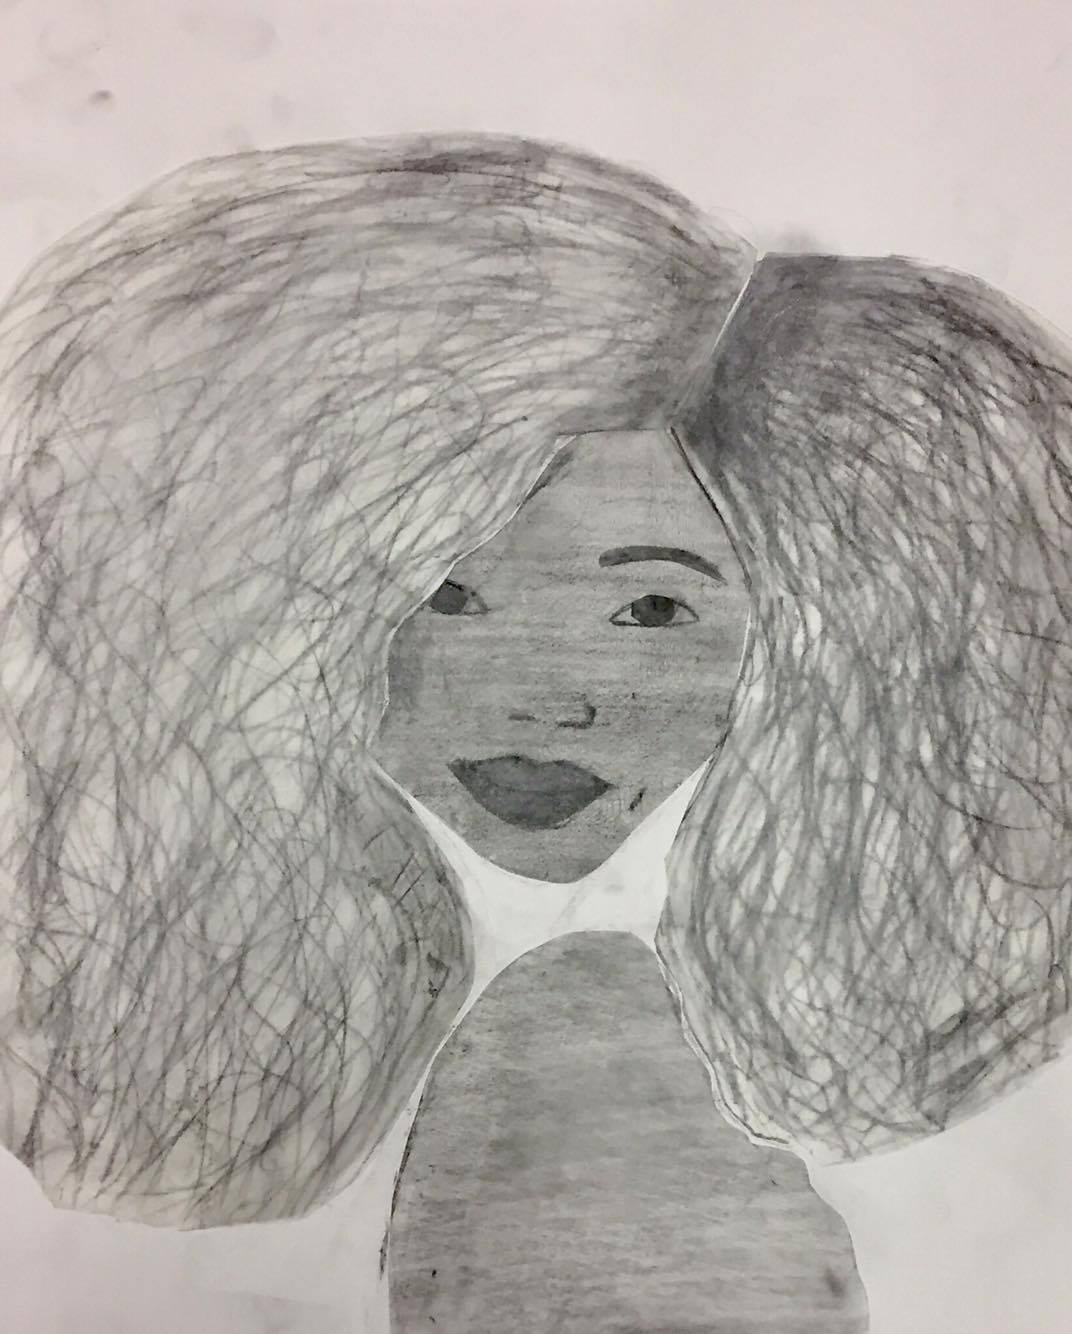
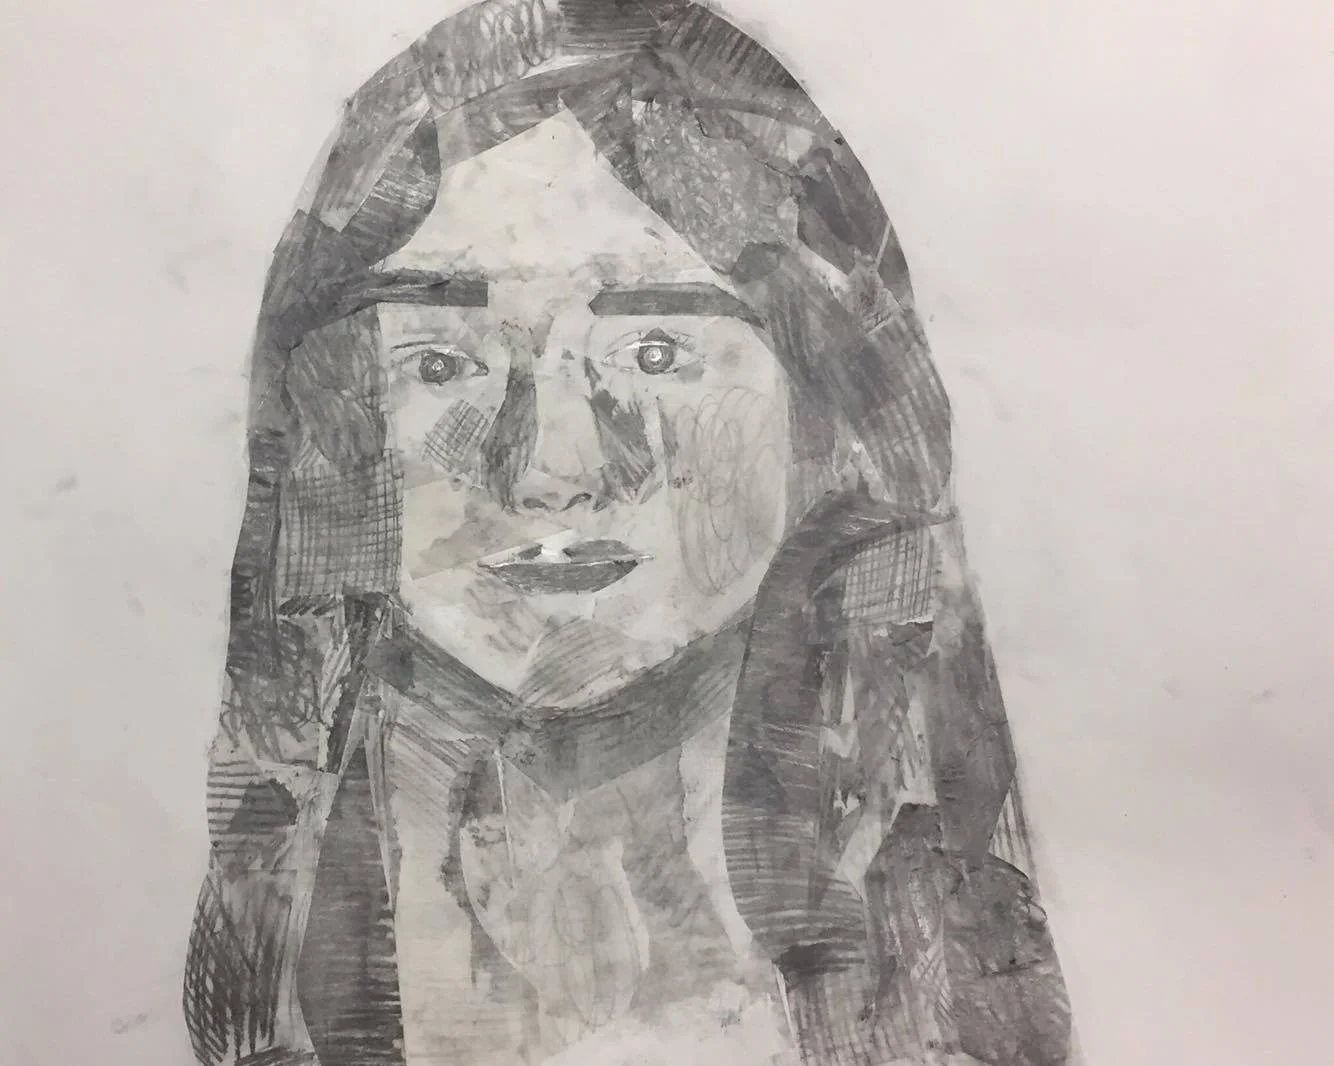
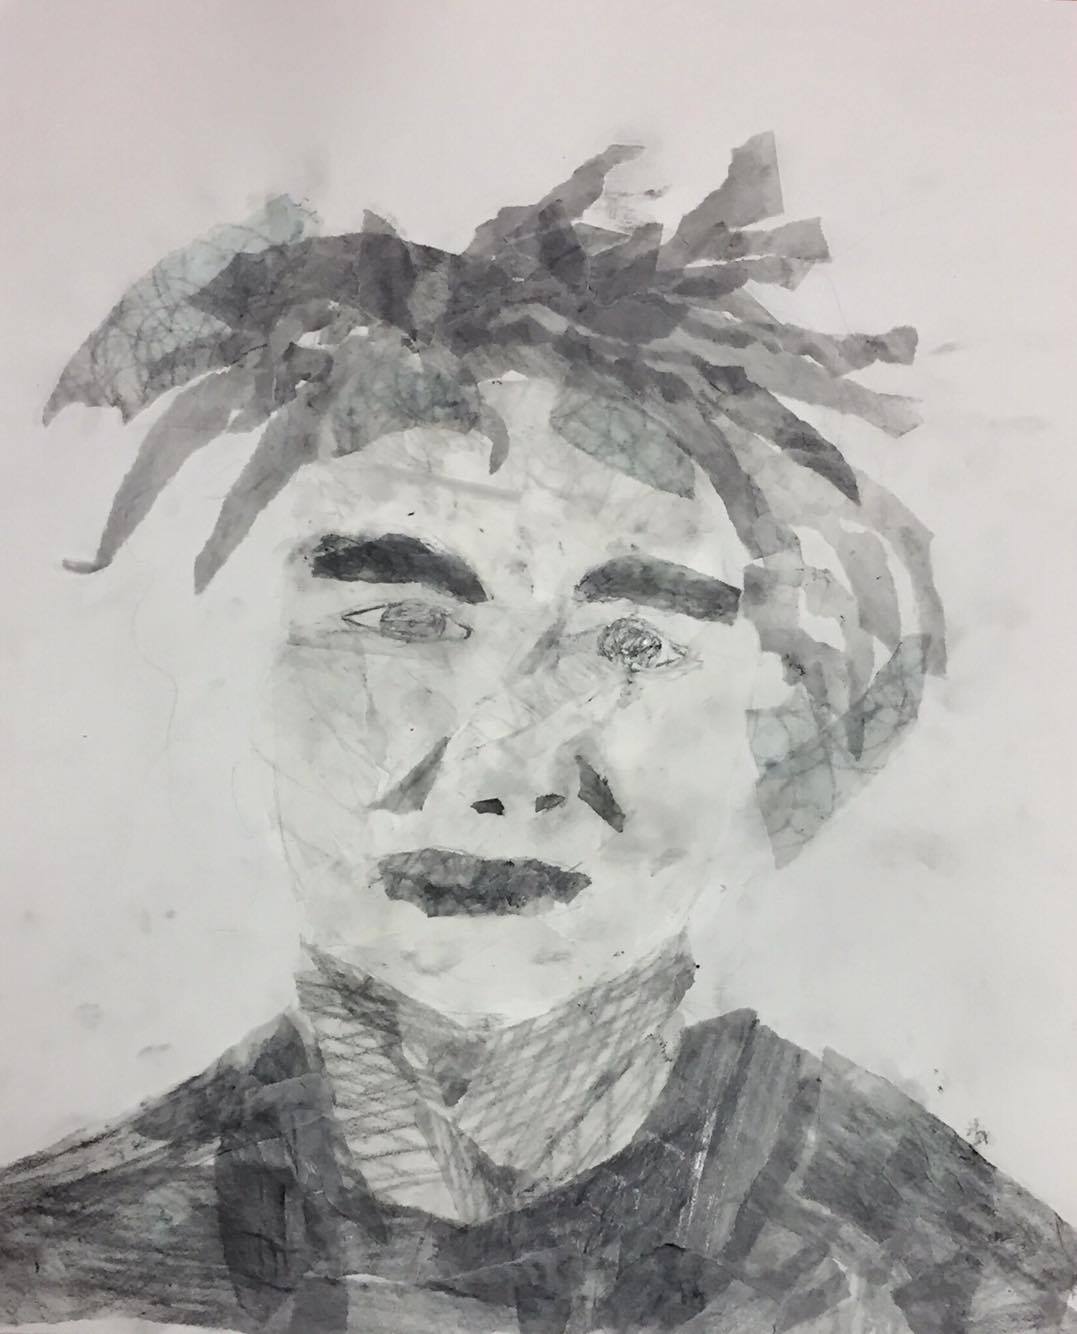
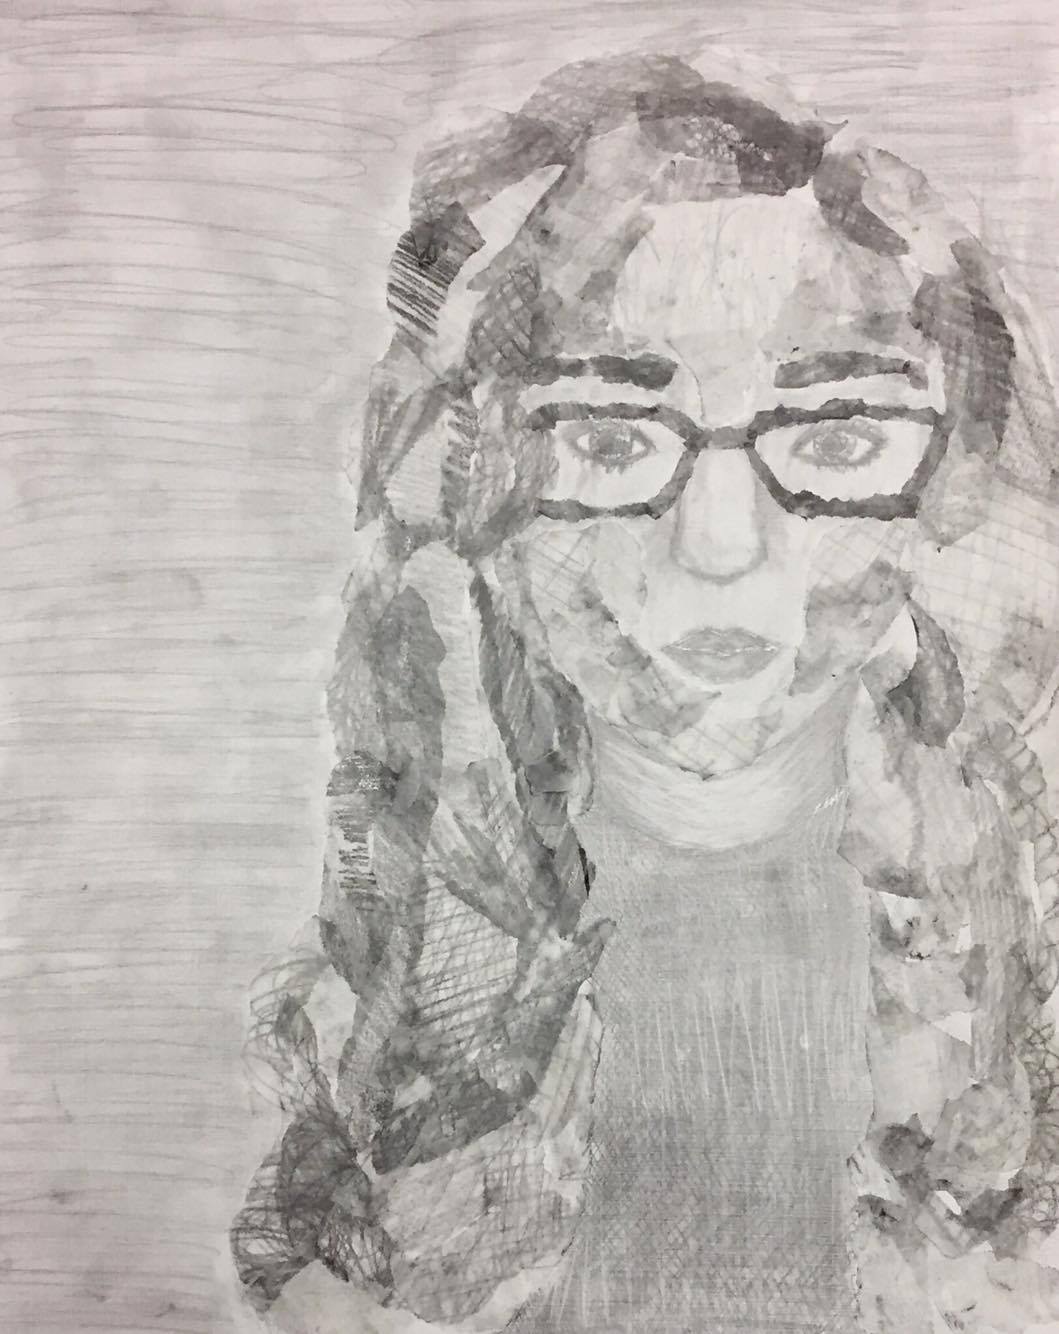
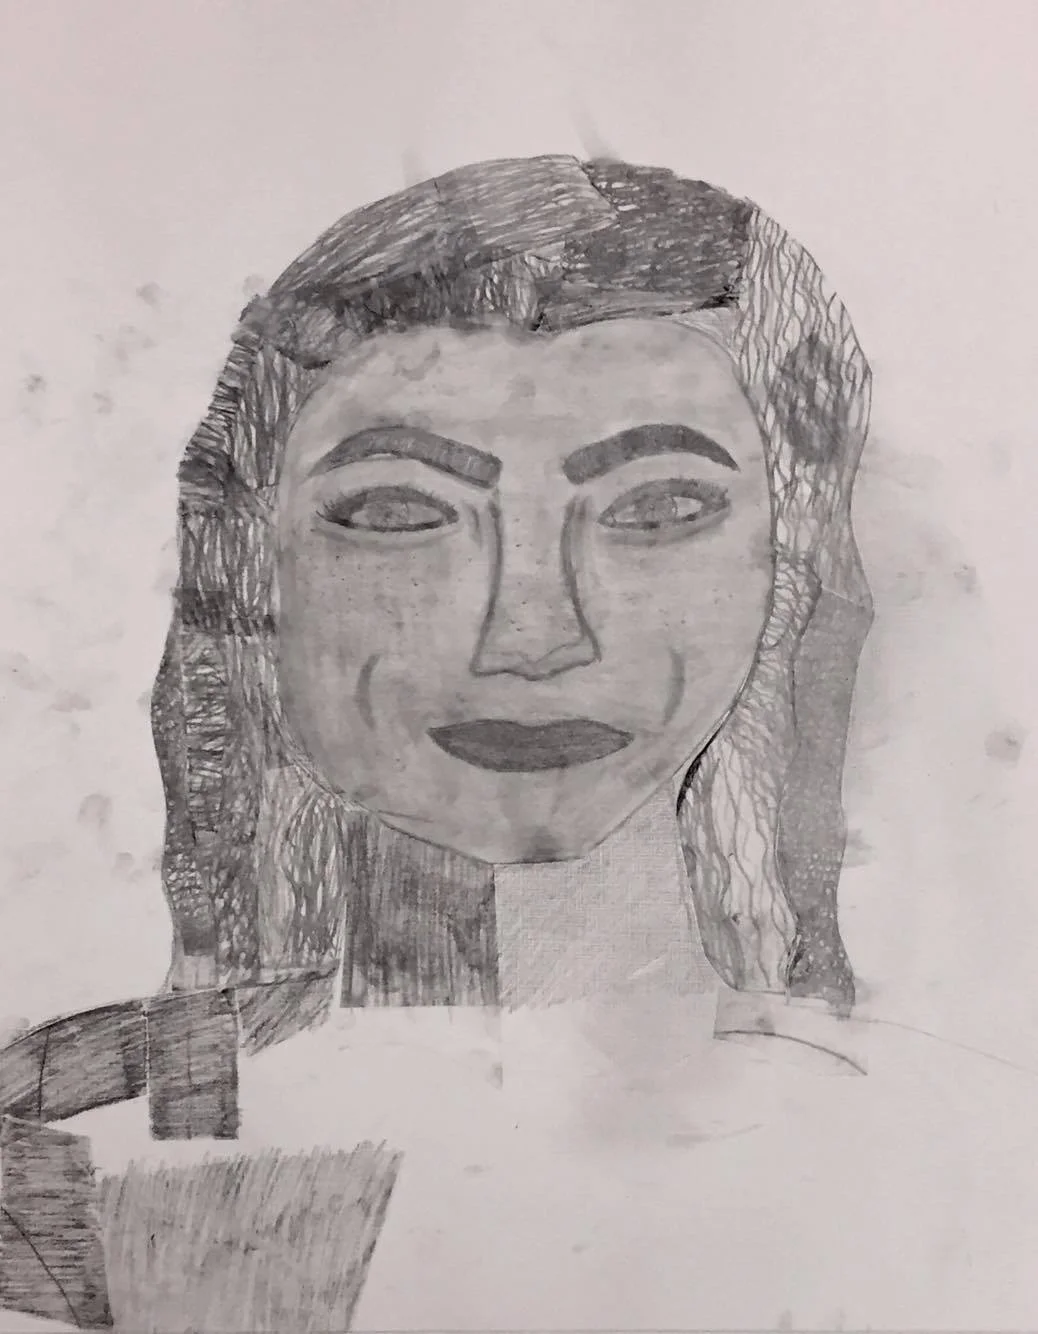
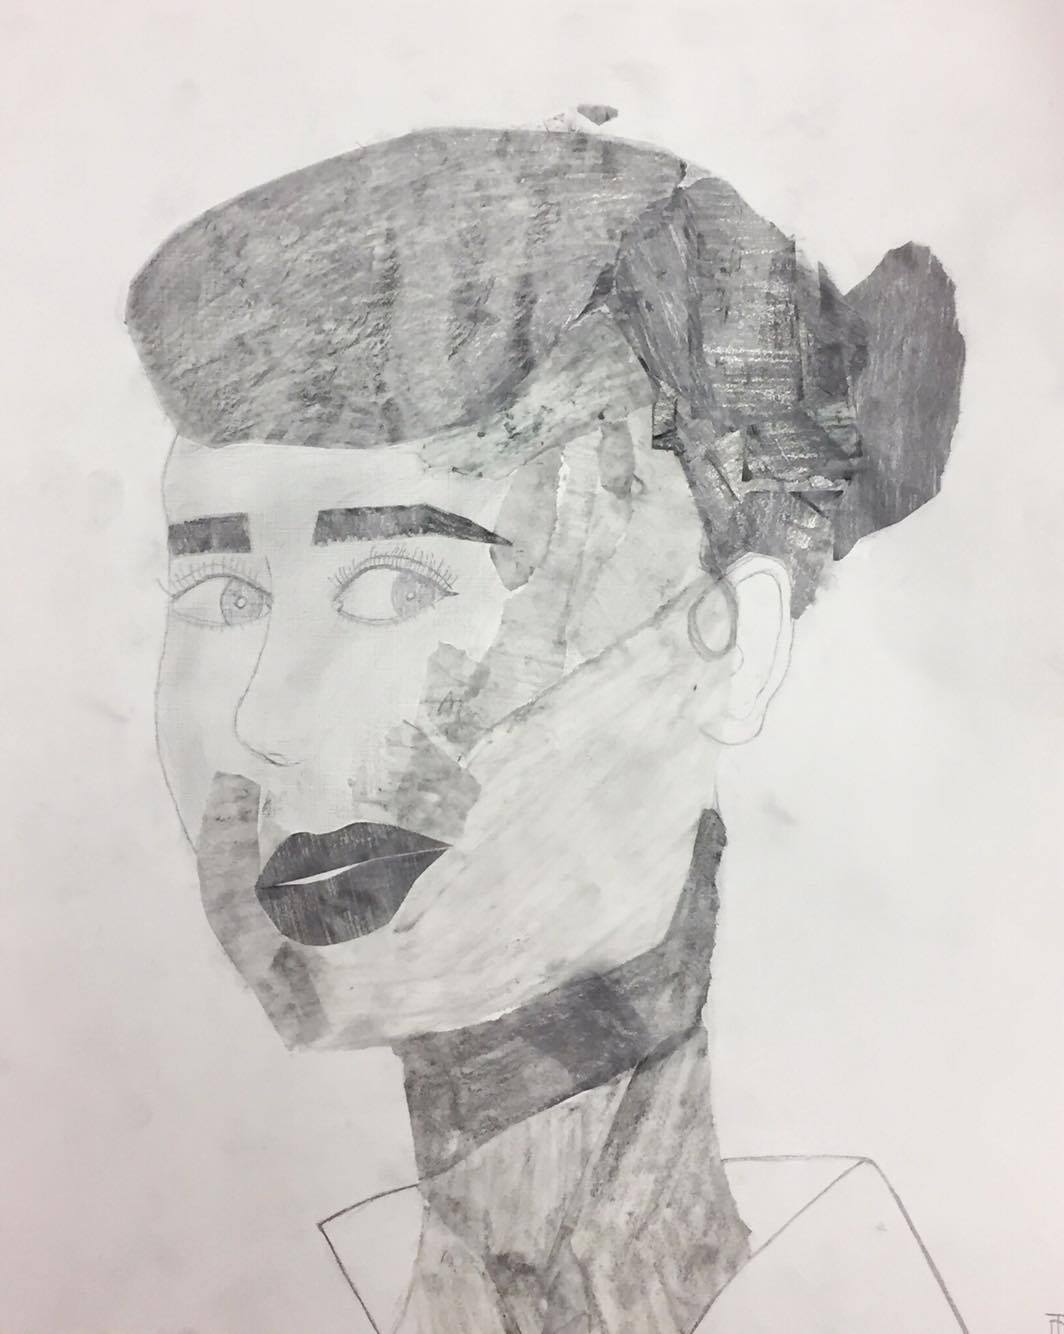
The Honors Art class will complete a graphite drawing exercise that will teach them to distinguish between dark, light, and mid-tones. They will create a collaged portrait out of a variety of crosshatched tones on tracing paper, using the various tones to create value and form.
“BIG IDEAS”/ ESSENTIAL QUESTION(S)
Students will explore a method of portraiture that emphasizes the importance of shadows and highlights. The big idea is that they understand how shifts in color temperature translate into black and white tonal layers, and how these layers can be manipulated and built up to create a fluid composition.
STUDENT OUTCOME OBJECTIVES
Students will:
Convert – convert a portrait into black and white and into a range of values
Manipulate – manipulate the values and build them up with crosshatching
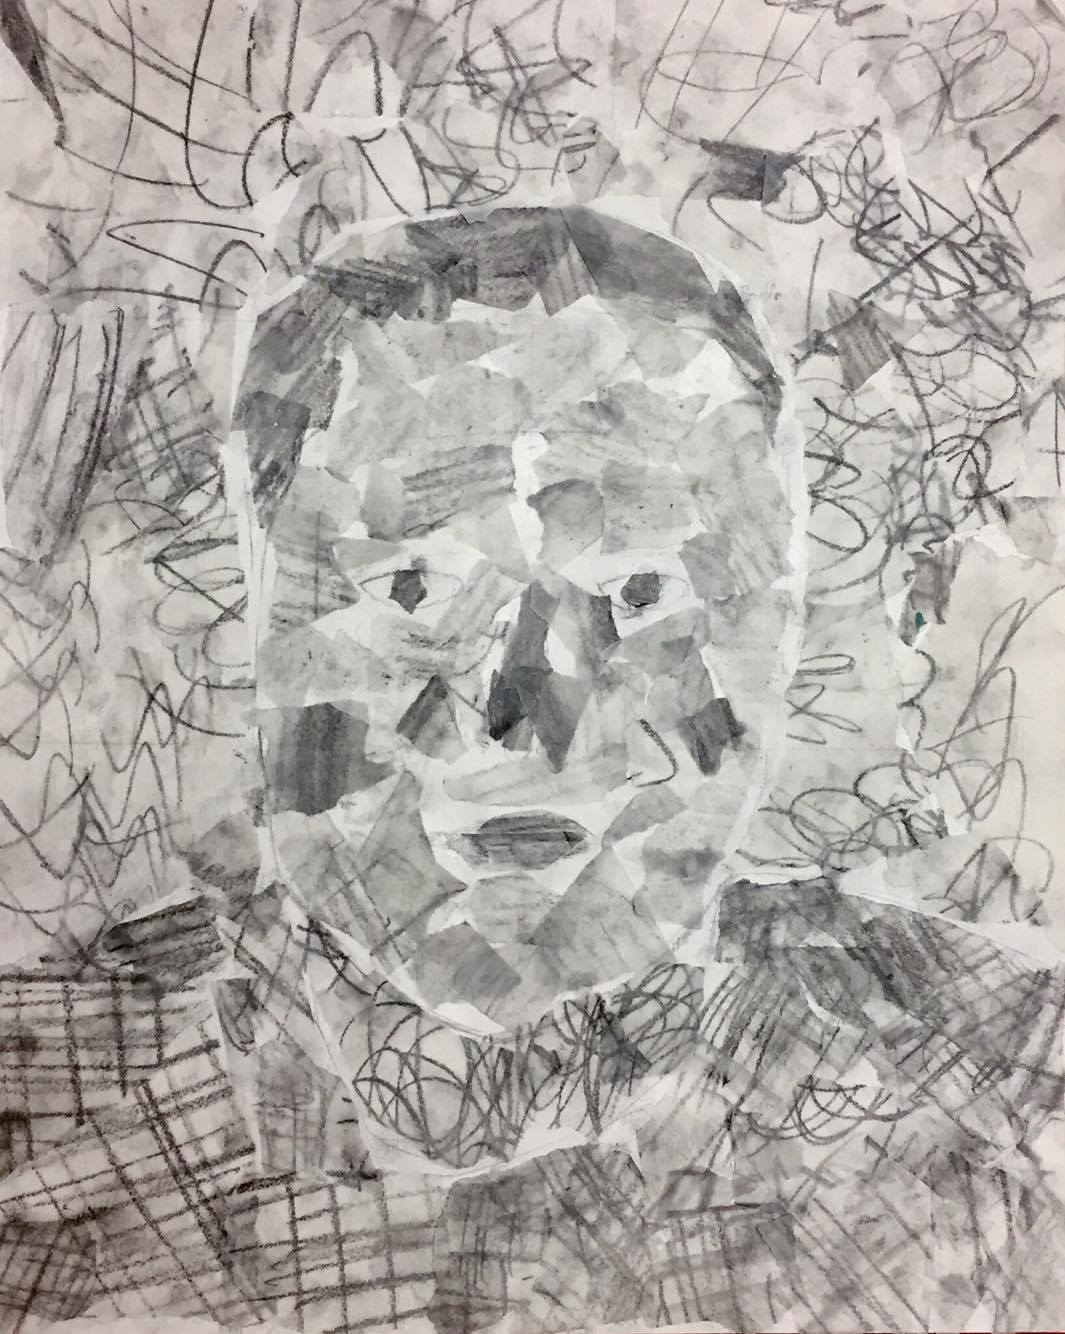
Rearrange – tear out sections of tracing paper and assemble them to create a portrait
PRIOR KNOWLEDGE
Students must have basic knowledge of crosshatching and portraiture.
LESSON PREPARATION TIMELINE
Prepare examples for the class, building a lesson plan
Introduce the lesson to the class, giving homework to bring in a “selfie” or image for a portrait drawing and gather materials for the lesson
First day of lesson, creating texture drawings on tracing paper and mapping out portrait
Last day of lesson, students use textures on tracing paper to finish the project
Last day; giving students an assessment survey and hanging artwork
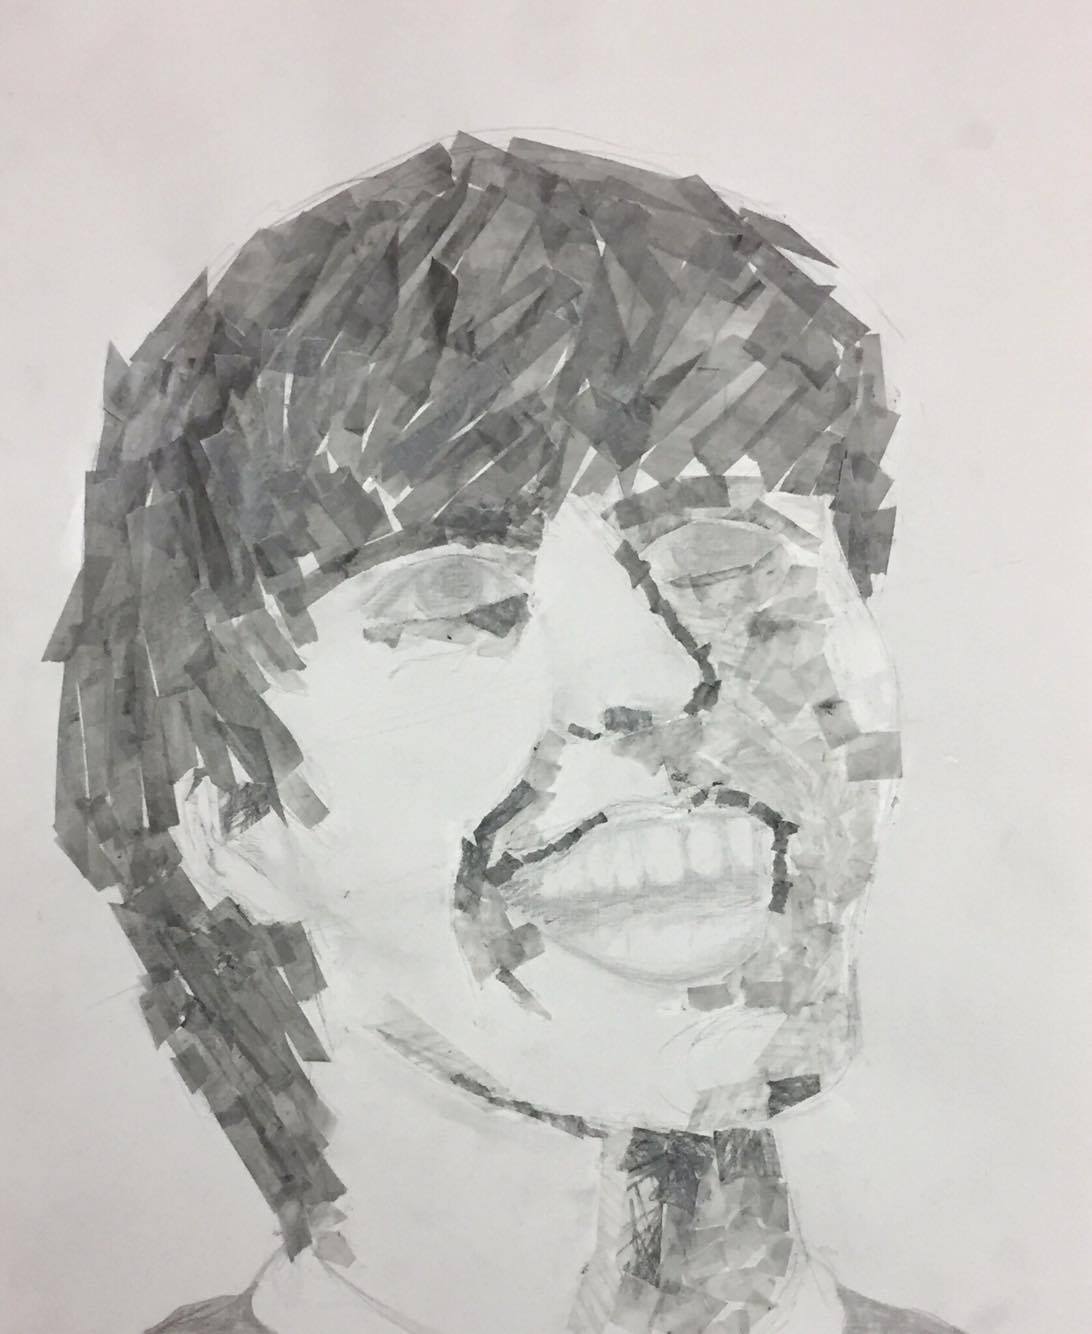
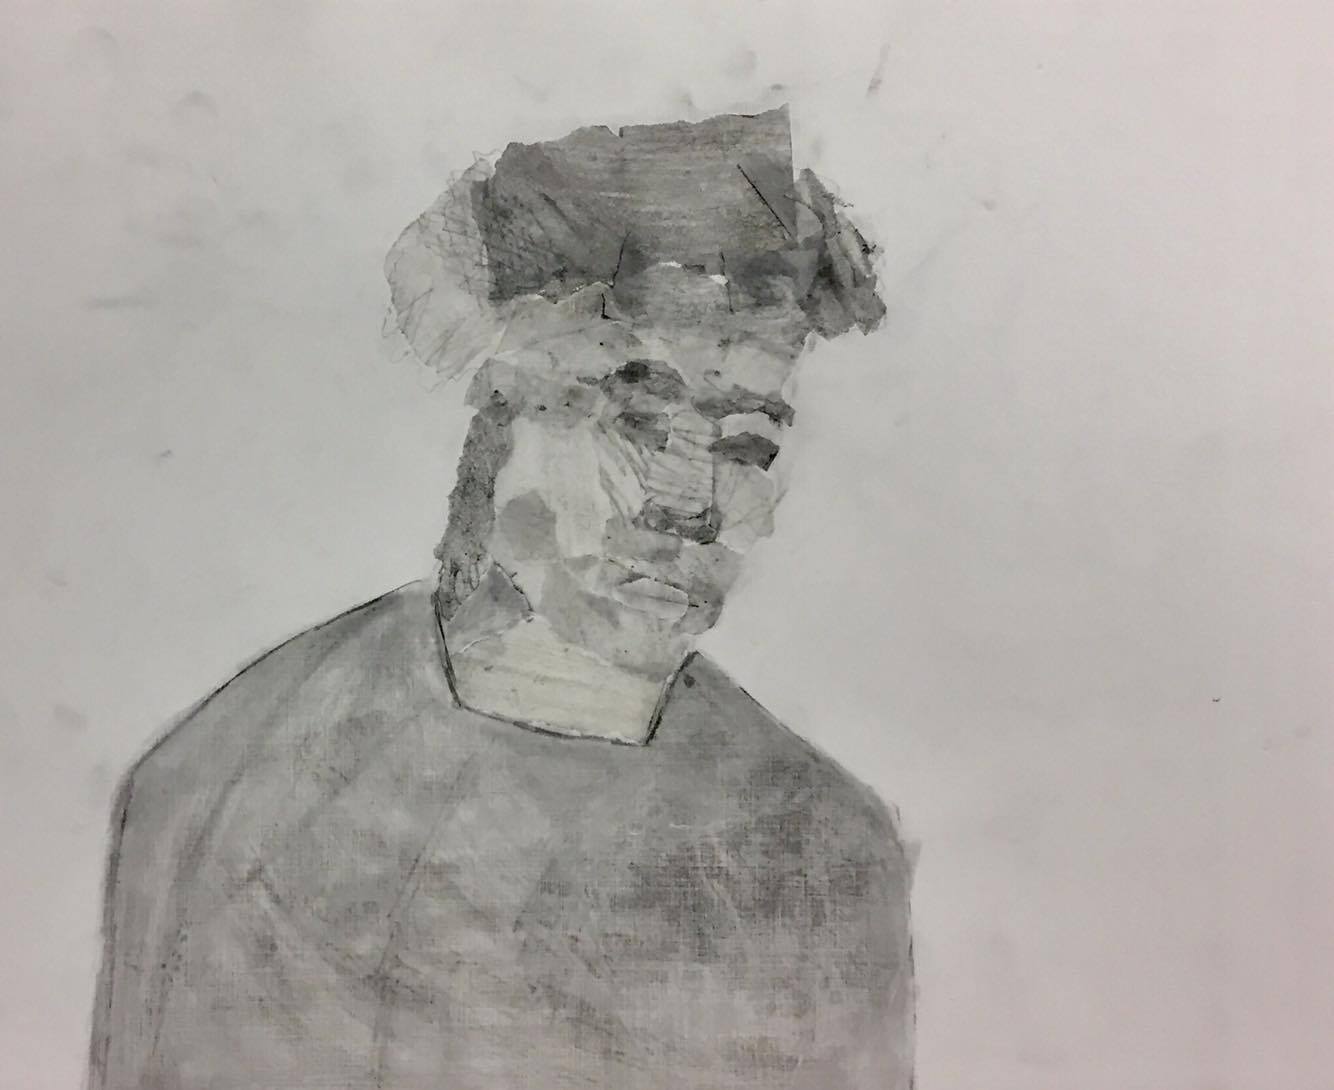
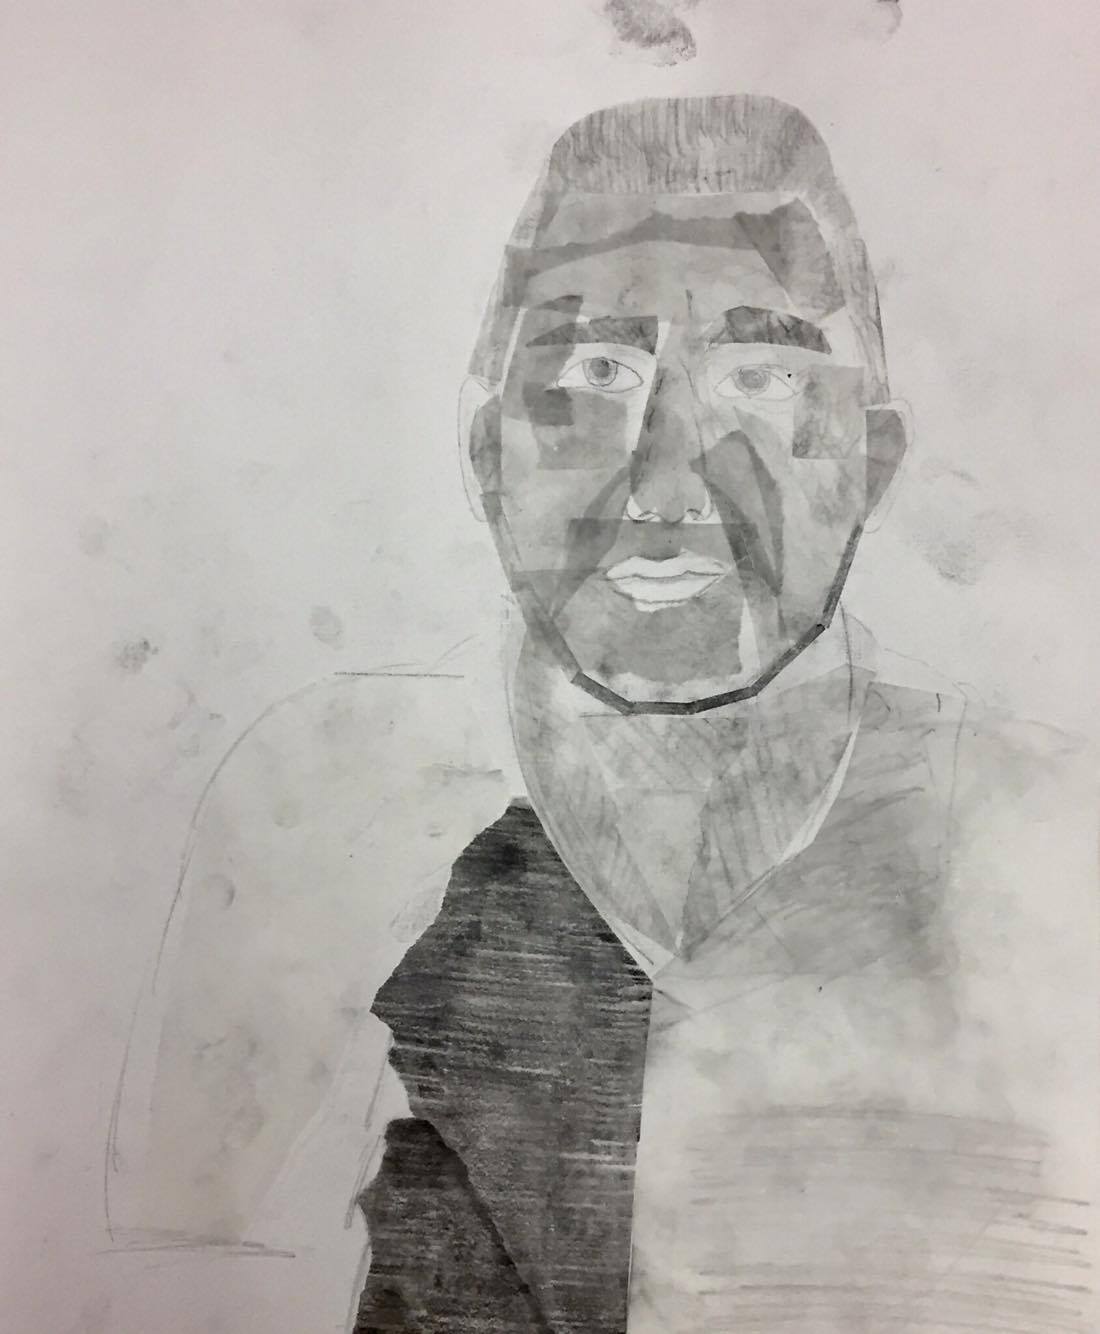
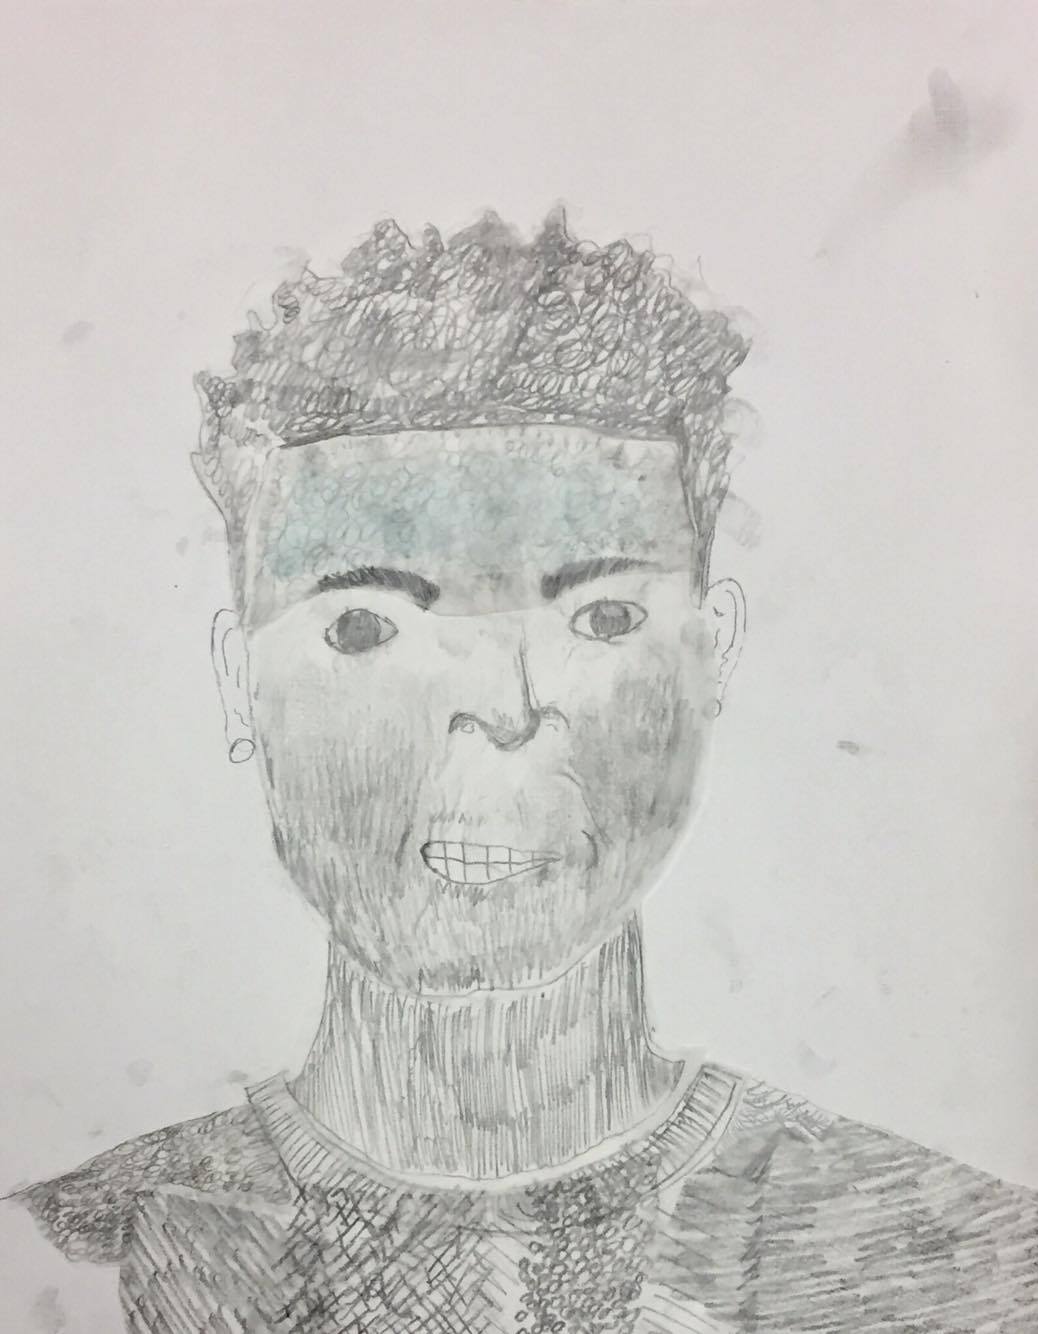
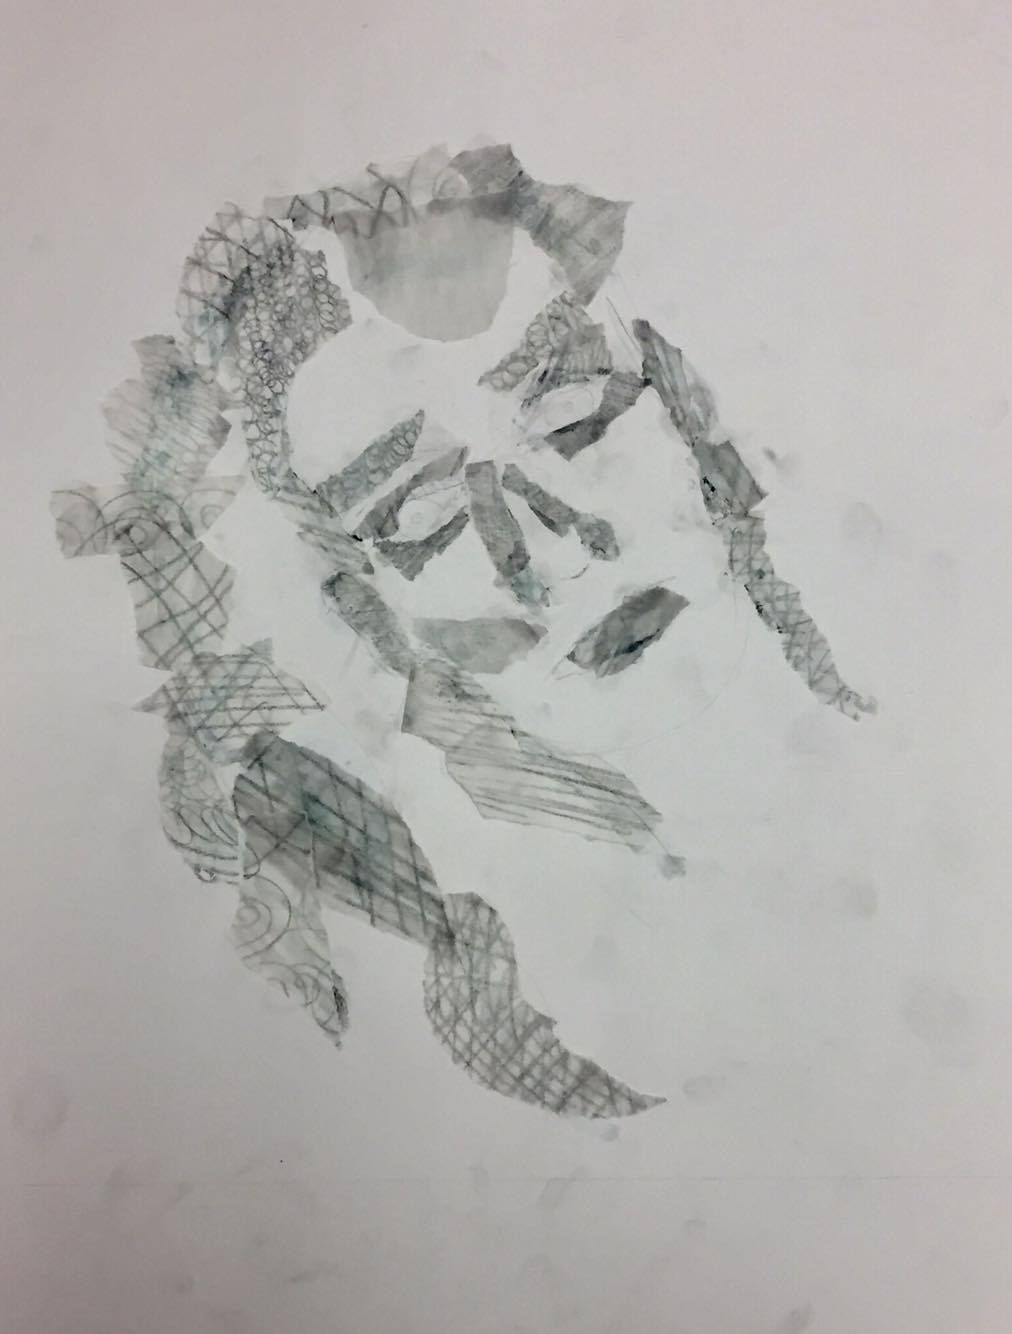
EXAMPLES OF ARTWORK
Provide a finished project and examples of each step in the 3-part process.
ADDITIONAL RESOURCES
“200 Projects to Strengthen Your Art Skills” by Valerie Colston
ASSESSMENT
A survey will be created on Google Forms, where the link will we shortened and used to make the survey accessible via QR code. After finishing the project, students will scan the QR code with the camera on their school-issued iPads, and complete the short online survey. The survey will include questions on clarity of instruction, use of materials, time restraints, and the student-teacher’s effectiveness in the classroom. After responses are submitted the projects will be critiqued in class, then mounted on colored construction paper or foam core so that they can be hung in the hallway near the classroom.
Quality of work will be judged by ability to follow directions and the level of exploration taken during the process. Students will be evaluated on their ability to use the time during each of the 3 class periods efficiently as well as level of completion of the project. Successful work will address the entire composition and use a full range of values.
MATERIALS
Tracing paper- provided (13 sheets, cut in half)
Graphite pencils- provided (25)
Glue sticks- provided (25)
Paper- provided (25 sheets, students will trim)
Colored paper & Foam for mounting- provided (various sheets, 25-30 total)
LEARNING ACTIVITIES AND TIMING
1. Preparation: The students select a portrait or “selfie” that they would like to use for the project and bring it into class. An email will be sent out the day prior instructing them to have this ready for the first day of the lesson. (outside of class)
2. Day 1: Introduction of the entire project, the 3 major points of it, explanations of examples highlighting the step-by-step process. There will be time for any questions the students may have. Materials will be passed out following the questions so that the students are not distracted or tempted to start working during the introduction. (10 minutes)
3. After measuring out a line to crop the paper at 13.5x11 (to match the proportion of their iPads) students will draw the image that they have selected from their iPads. Their goal will be to create a very minimalistic outline of what their final portrait will look like, focusing on mapping the face and leaving out details for now. They will need to keep the image light so it doesn’t show underneath the tracing paper, so students may use an eraser to make the lines faint. (30 minutes / end of first day)
4. Day 2: Students will create varied textures and values from cross-hatching and hatching shading on a sheet of tracing paper. They will fill the entire sheet with a range of black and white values, paying attention to which of these is the lightest light and which is the darkest dark. All of the tracing paper used for the project must have some type of mark on it. (20 minutes / beginning of second day)
5. Students will tear out different pieces from the tracing paper and begin arranging them to match the tonal shifts of the portrait. They will use a glue stick to attach these pieces as they go. Students will use both their photograph and their sketch as a base for placing the values in the planes where they fit onto the face. They will have the option to convert their photograph into a black and white image or bump up the contrast if they have trouble spotting where these shifts occur. (This will be the longest portion; students will have 20 minutes to start this step on the second day and all of the third day, 40 minutes, to complete this last step of the project)
6. Day 3: Students will be prompted to take a short online survey that will cover what they learned, what was useful, what did they find difficult, etc. I will be gathering all of this information online so that I can review it and take the responses into account for my future lesson plans. On that day we will also be looking at some of the work as a class (5-10 minutes). The work will be documented, mounted and hung for display in the nearby hallway of the school.