Create a Paper Pop-Up Card to Share!
When we want to show someone we care about them, we often send or give them a card with a kind message written inside. Sometimes, we show them a little extra enthusiasm by including a drawing, photo, or other surprise in the card or envelope.
In this guide, you will consider acts of care and caregiving, then create, decorate, and write a message in a small construction paper pop-up card to give to a person you care about.
This project will take 30-60 minutes to complete depending on the level of detail in your card design. This activity is recommended for participants ages 5 and older, but younger children can participate with the help of an adult.
Project Set Up
Find a large, flat surface on a desk, table, or even the floor to set up and work!
Materials
Construction paper
Glue stick
Scissors (not included)
Pencil
Crayons
Optional: stamps, stickers, glitter glue, or other decorative materials (not included)
Instructions
Let’s create a pop-up card!
Think about a person you care about who you would like to give a card to. If you’re having trouble picking one person, think of someone who you haven’t told in a while how much you care for them, or someone who could use an extra reminder that they are cared for. What do you love about them? Why are you glad they are part of your life?
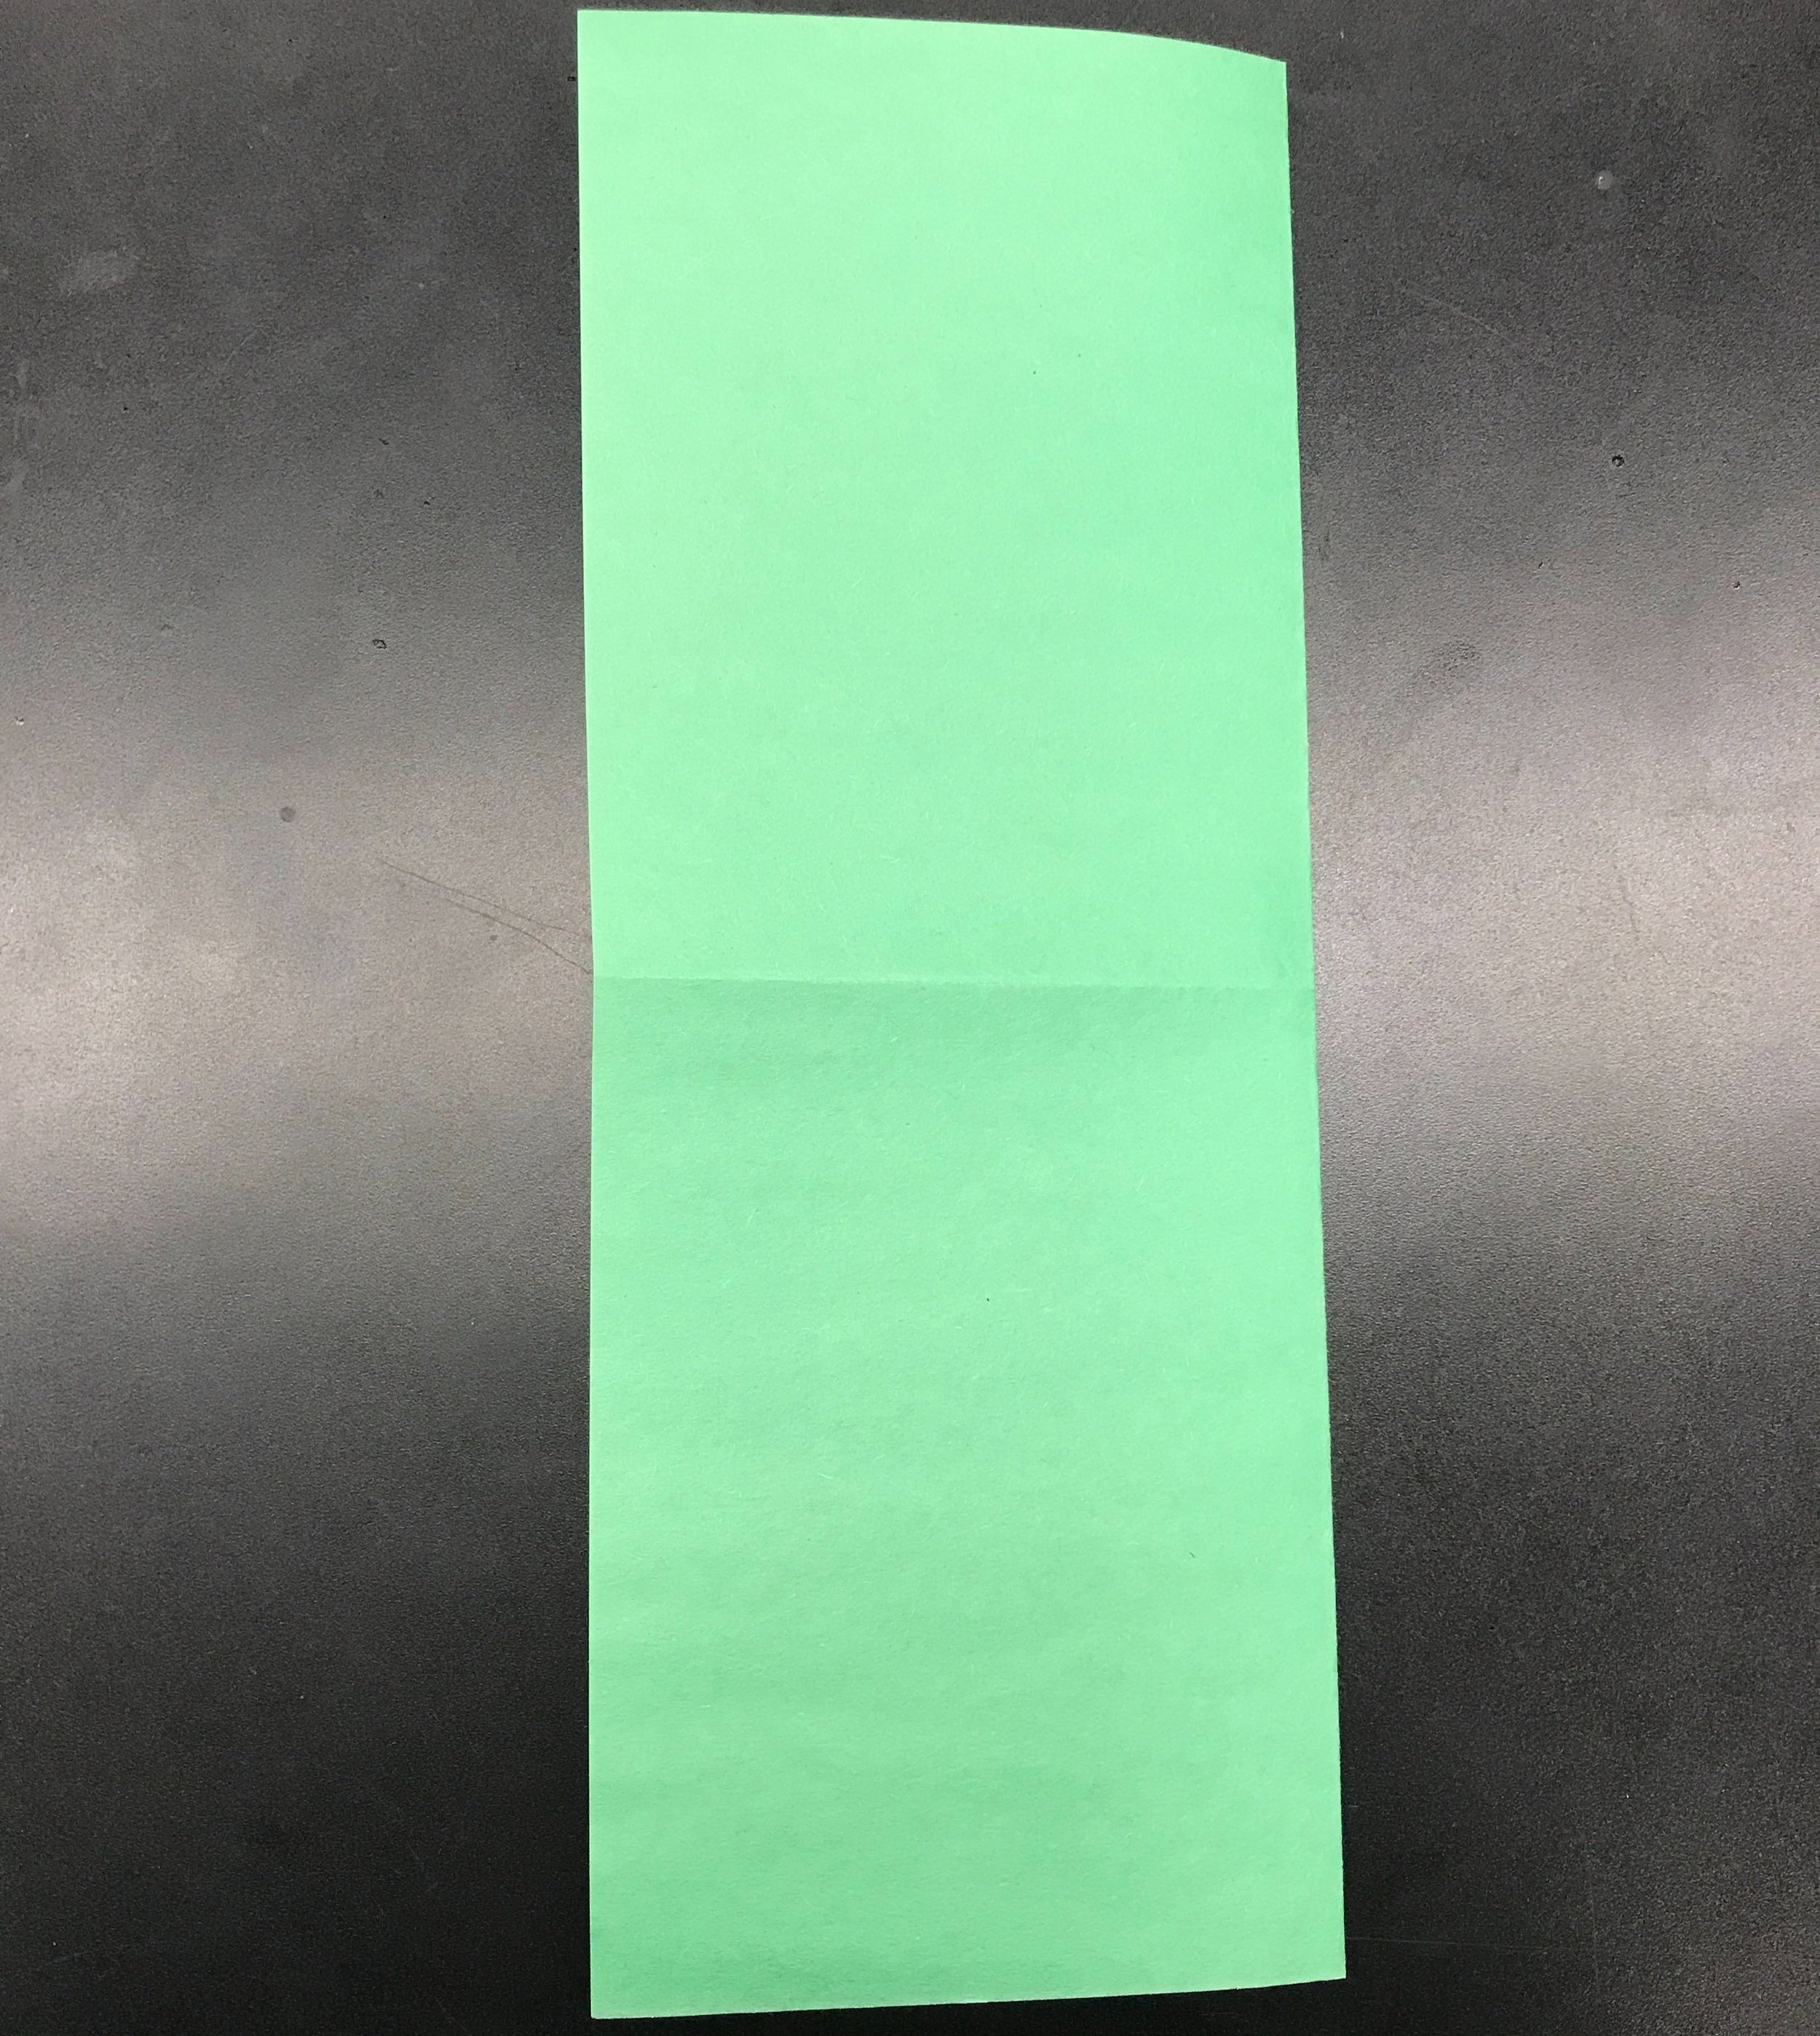
Step One: Choose a piece of construction paper to use as the base of the card, and lay it down on a flat surface so the short side is closest to you. Fold in half by bringing the top side to the bottom and making a crease. Then fold it again by bringing the left side to the right side and making another crease so that it makes a smaller rectangle that opens like a card.

Step Two: Unfold the paper, and re-fold once by bringing the right side to the left side.
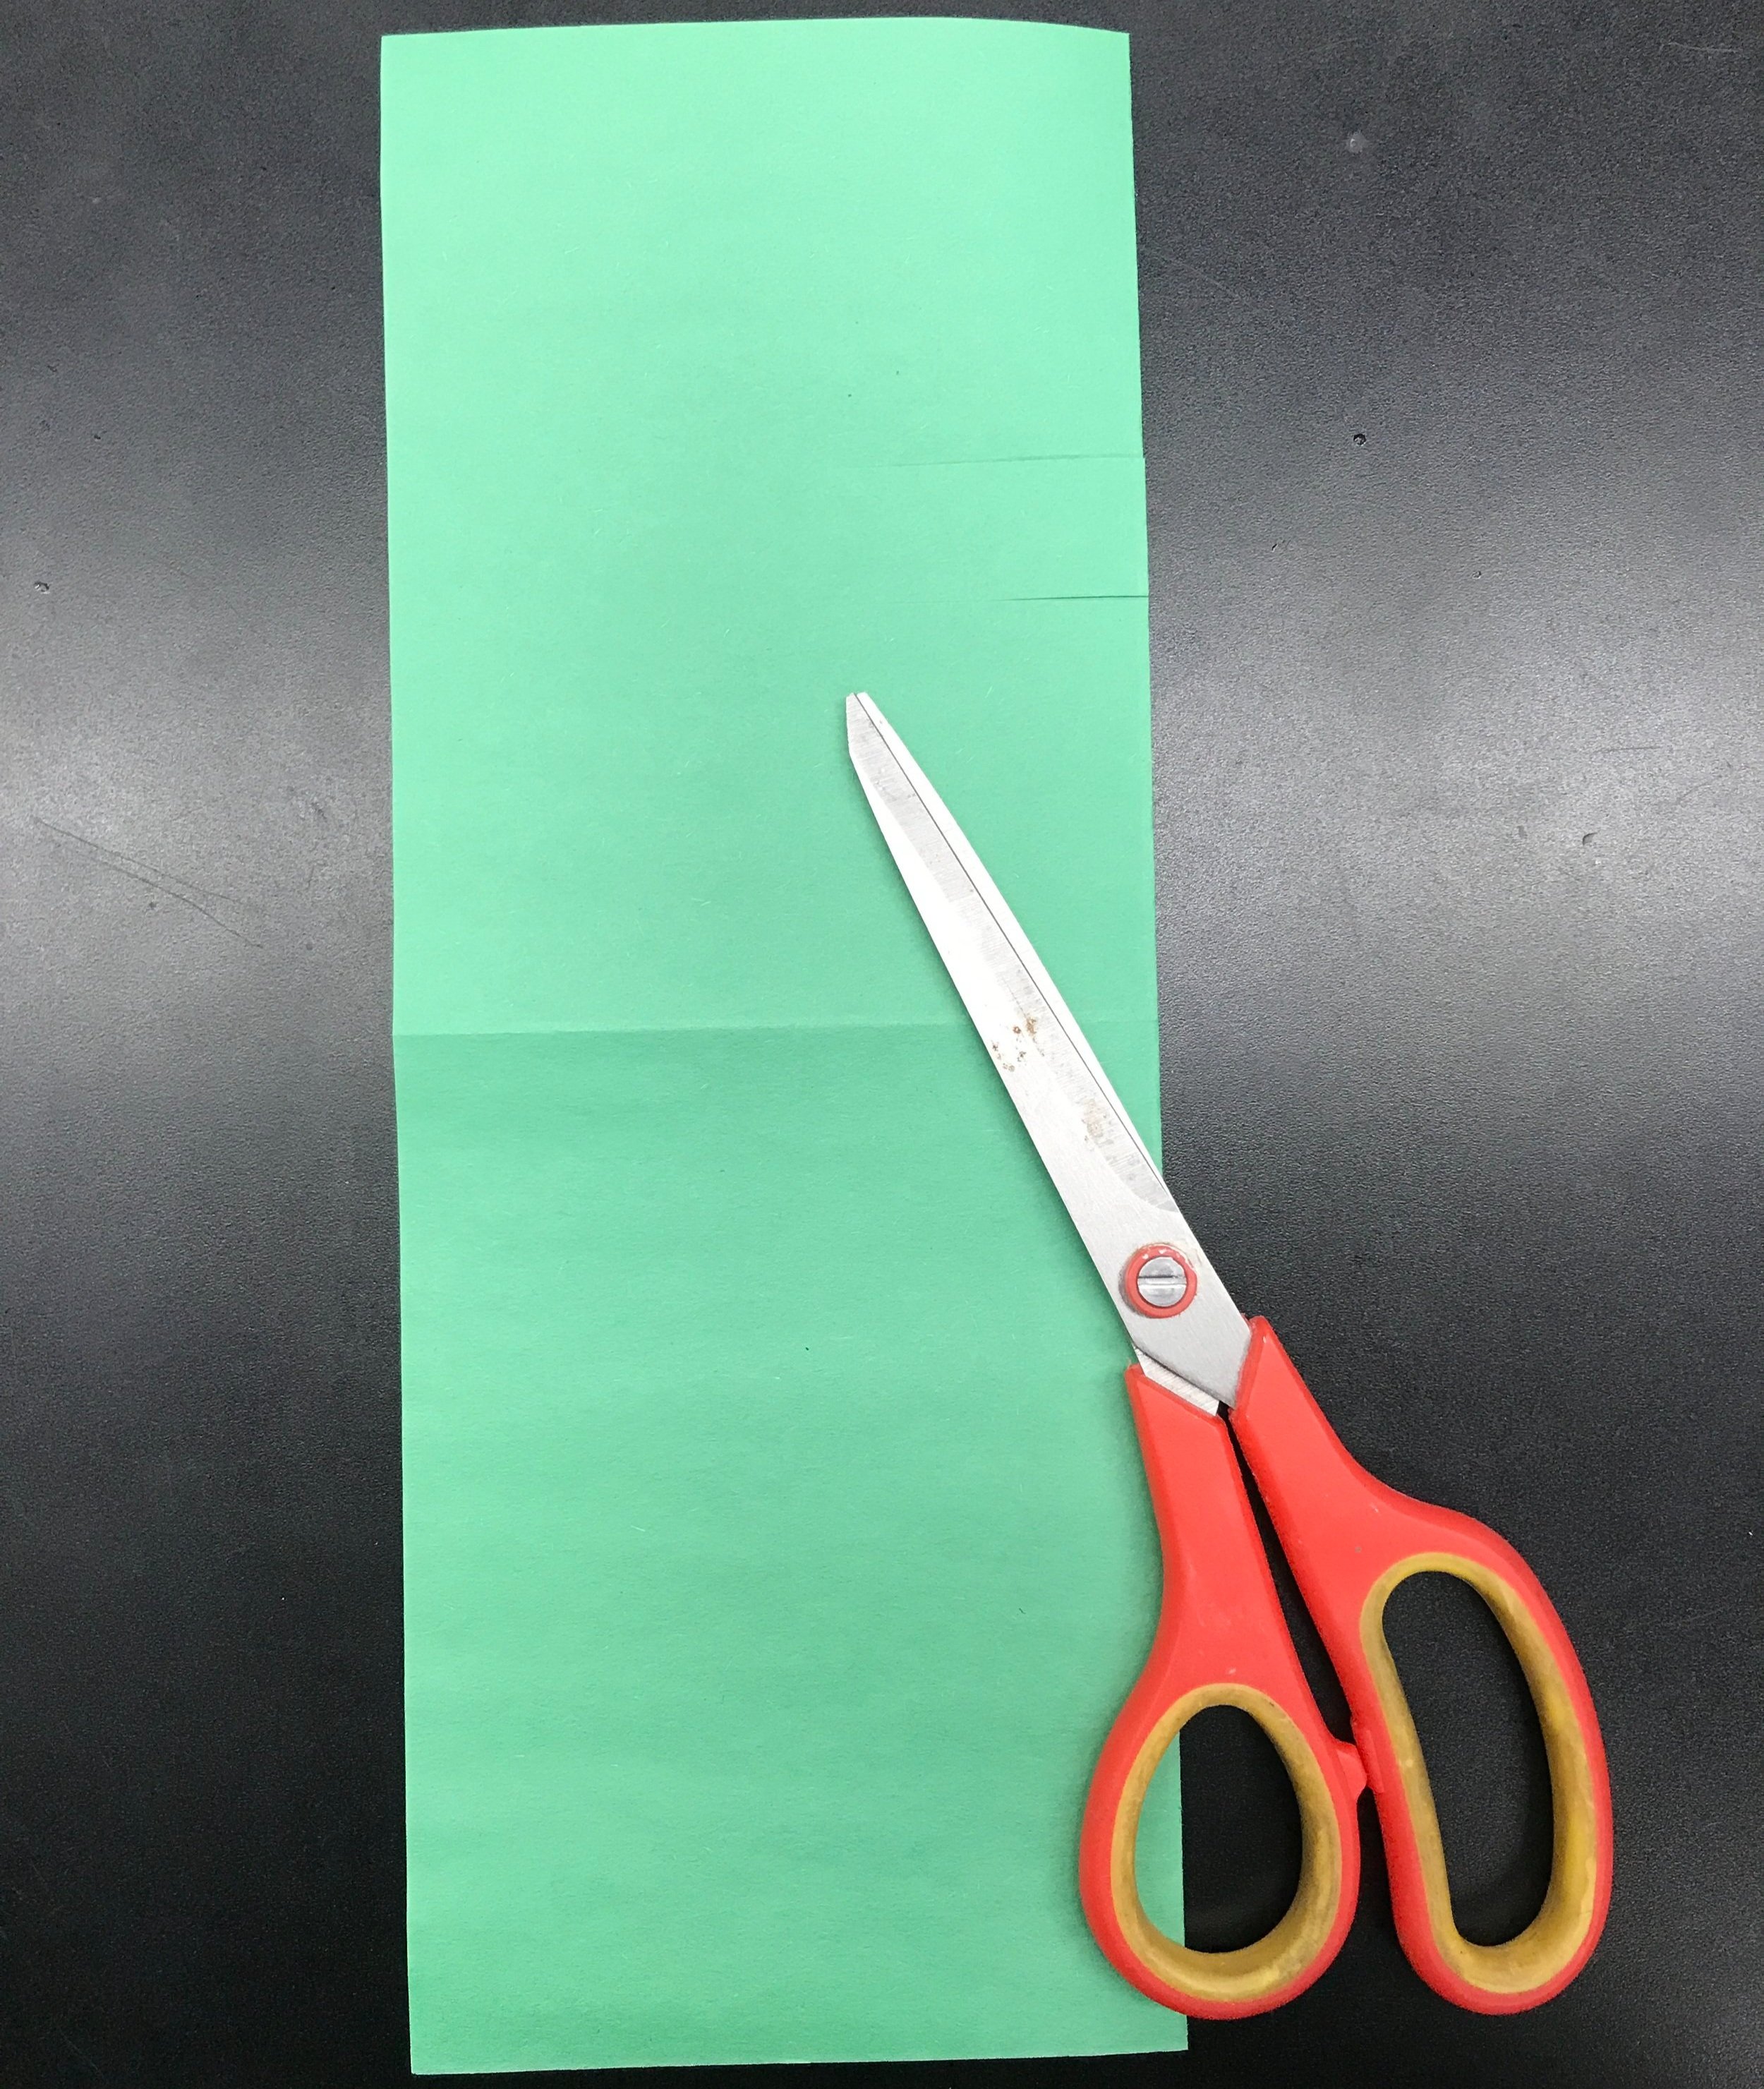
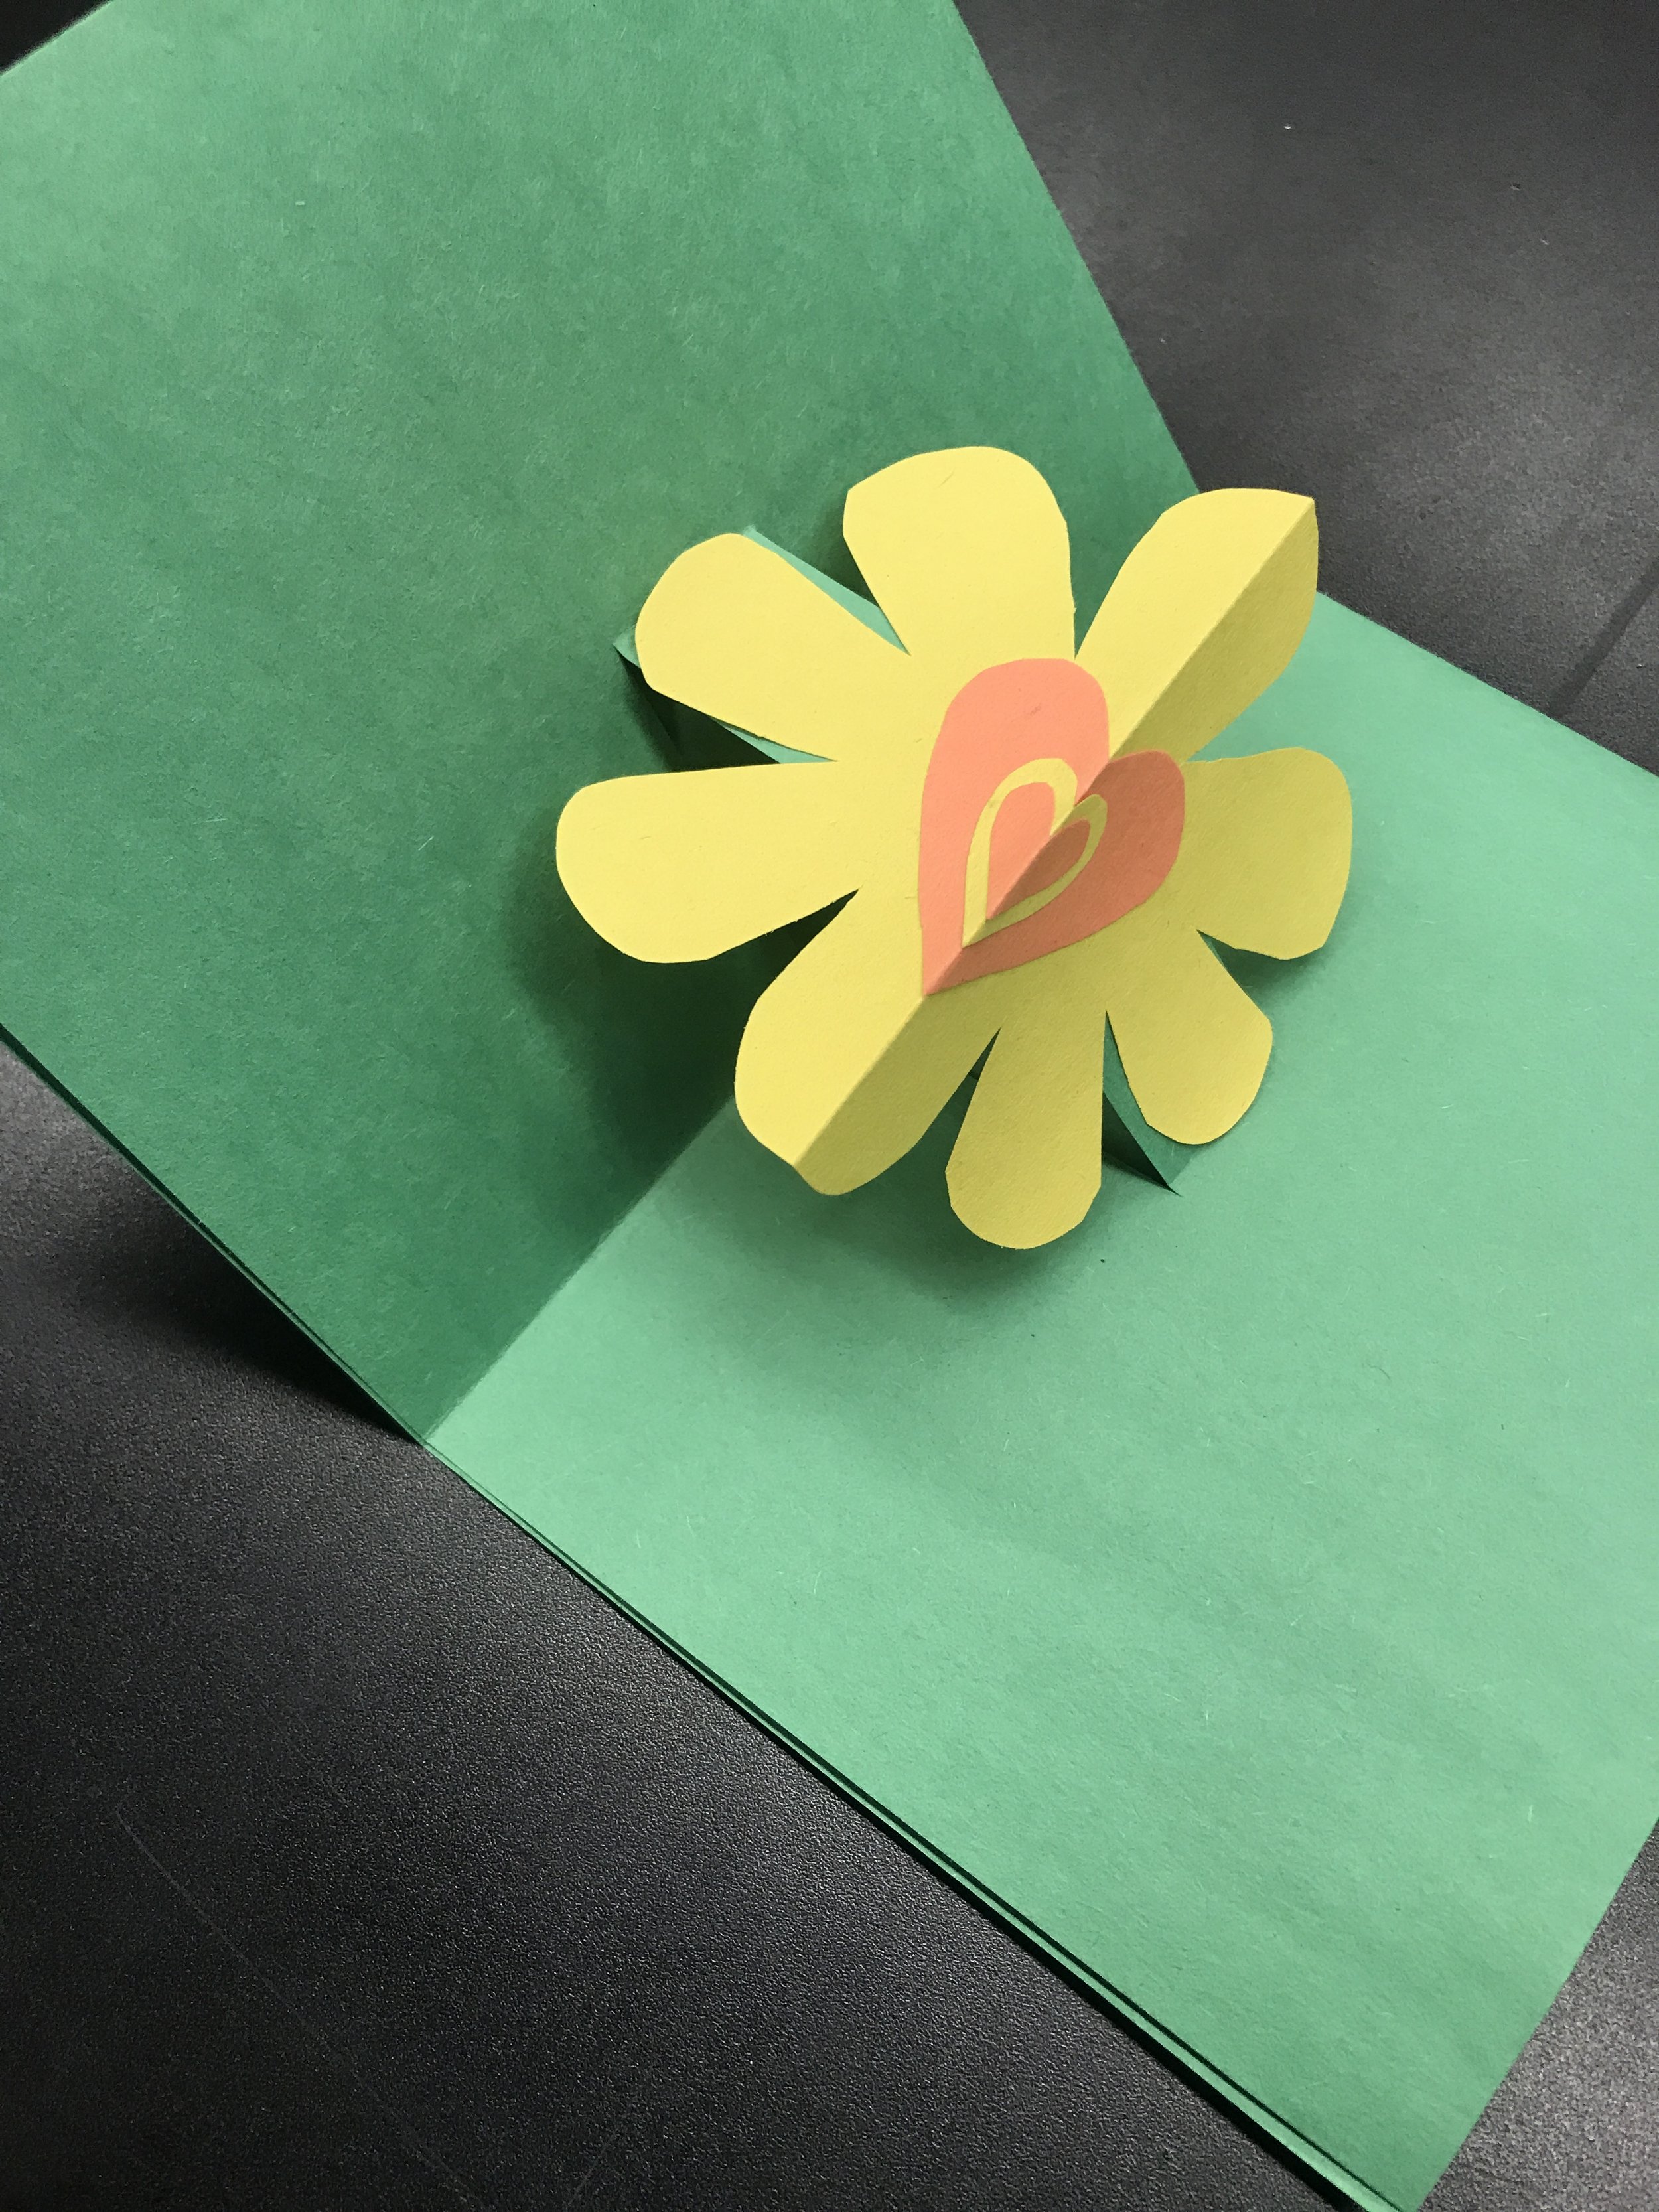
Step Three: Choose a spot along the crease on the right edge of your folded paper to create your pop-up. The closer to the center horizontal crease you make the pop up, the closer it will be to the top of the card when you’re done. Make two equally-sized cuts about half an inch apart and perpendicular to the folded edge. Cut only to the middle of the card.
Step Four: Unfold your paper, and re-fold back into quarters like in step one, this time with the cuts you made on the inside.
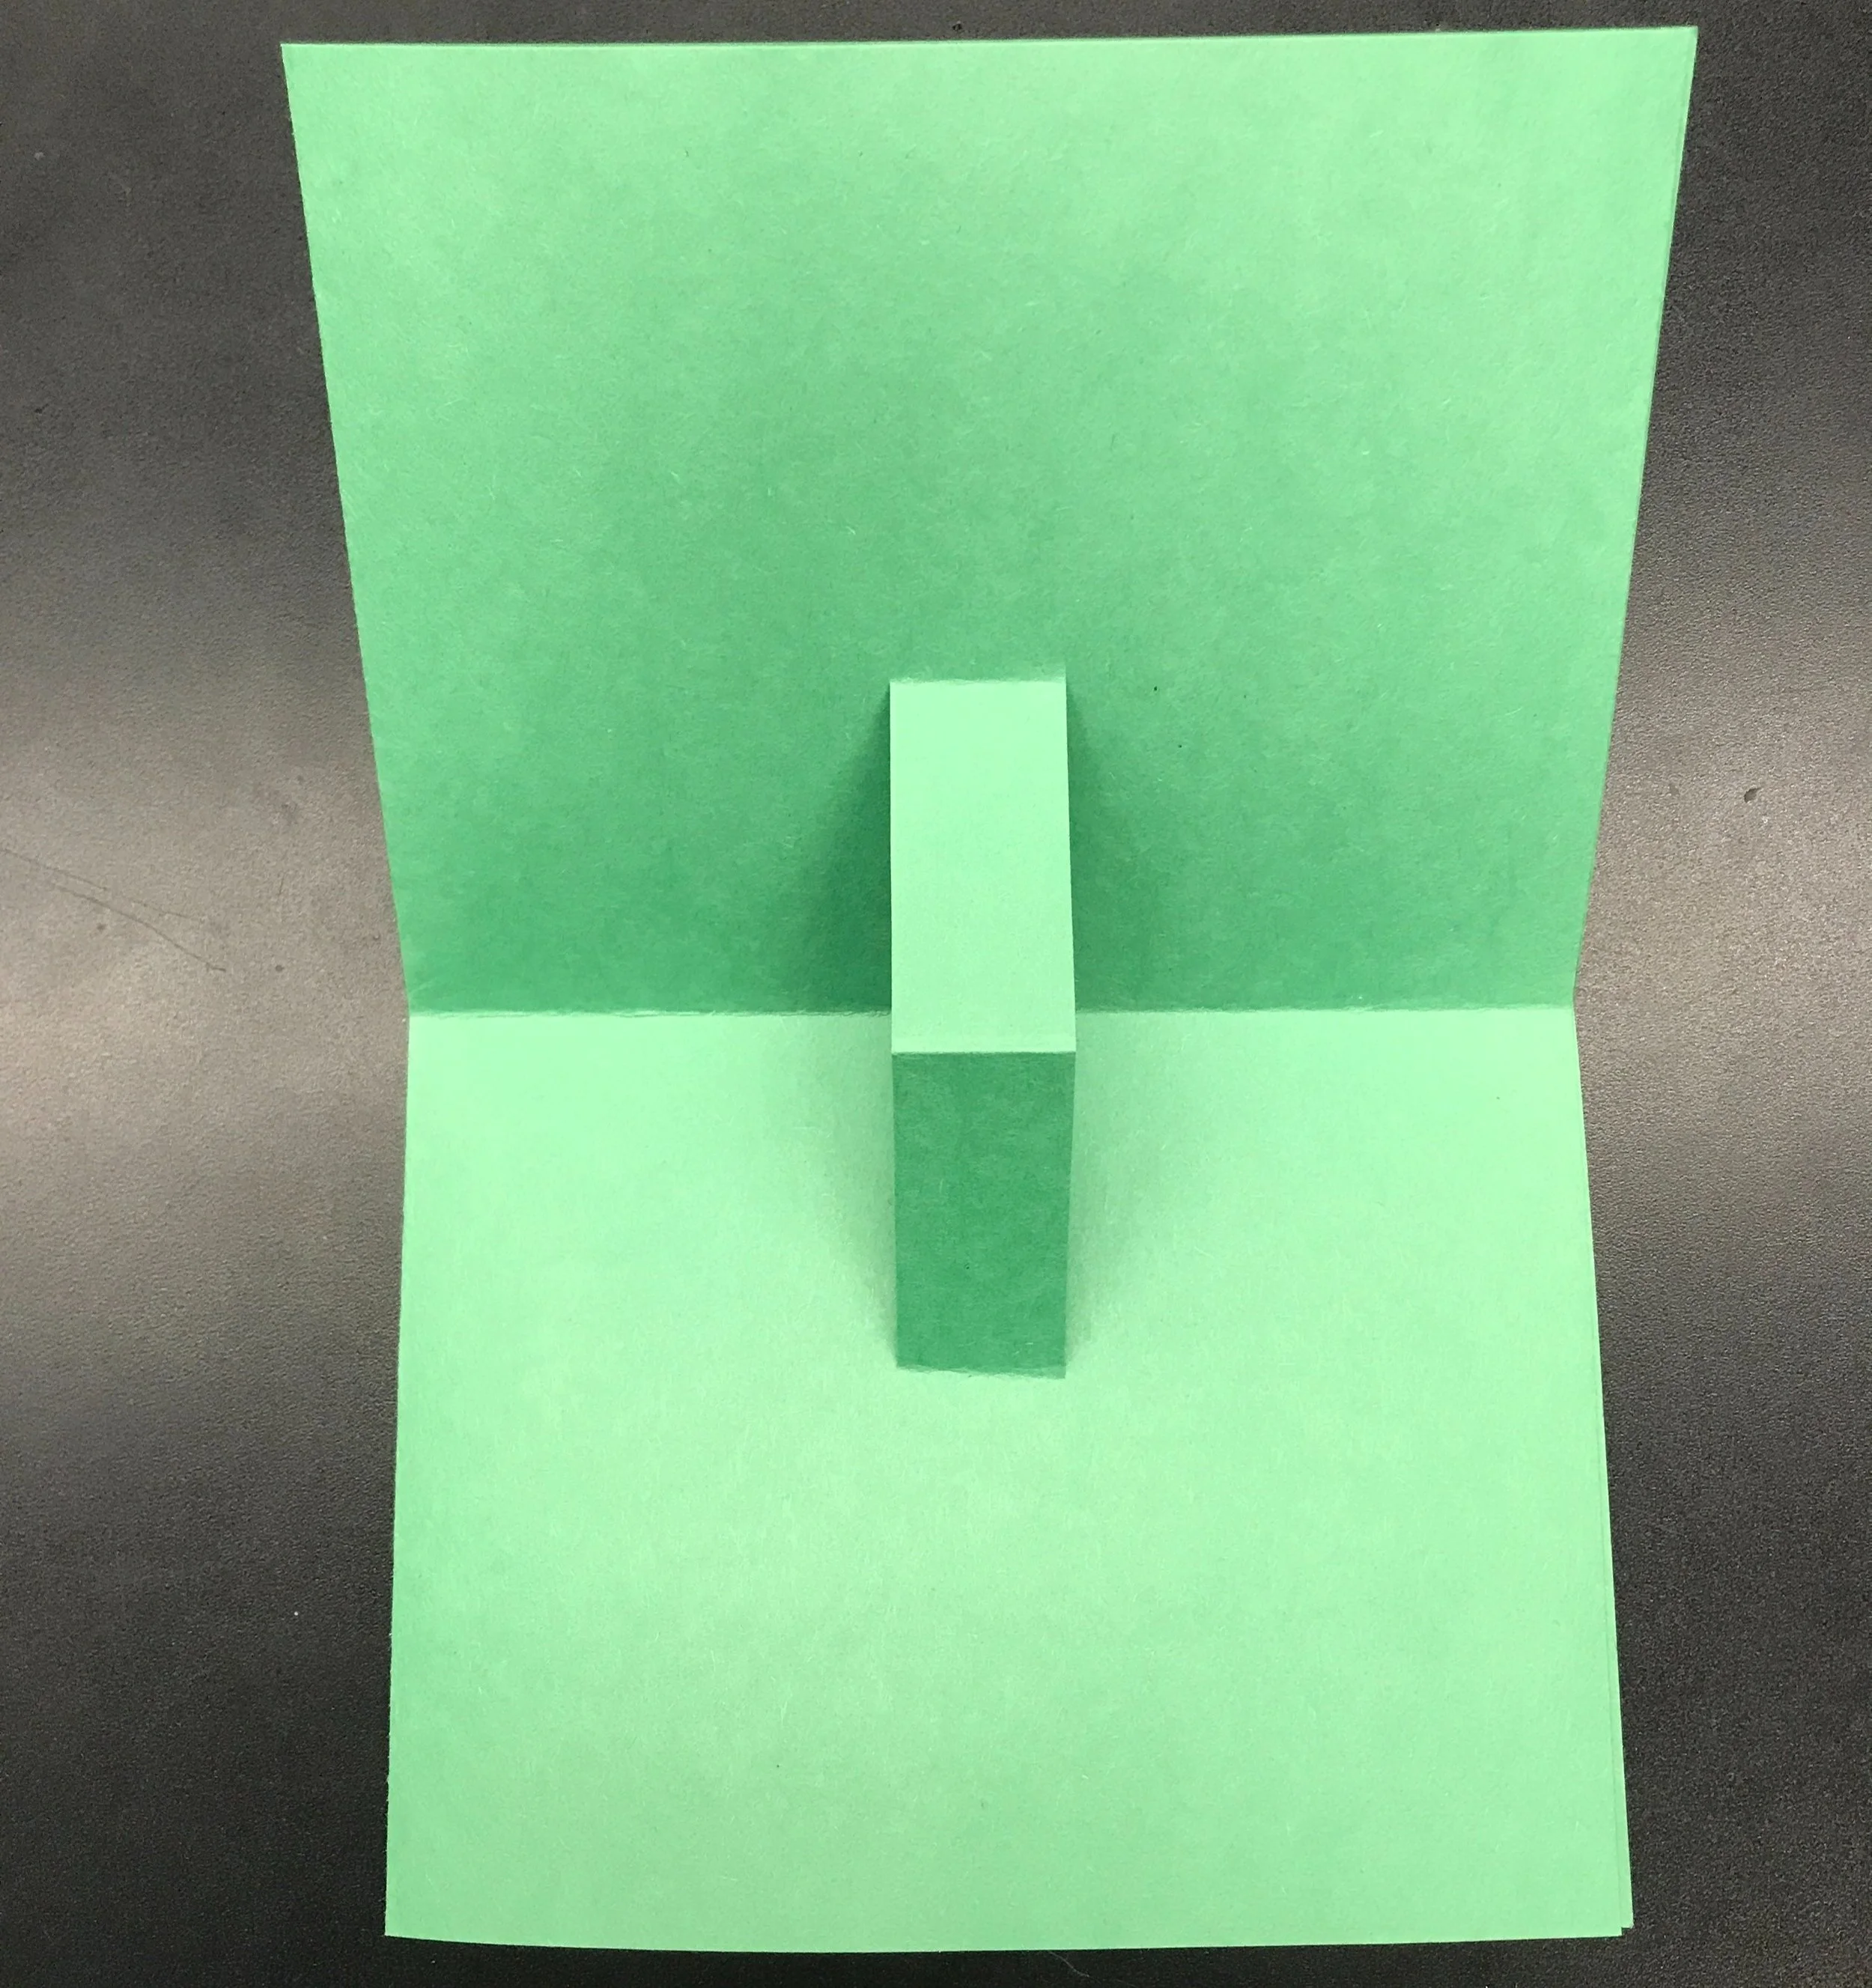
Step Five: Position the card so that it opens with the folded edge at the top. The ends that meet at the bottom help the card stand up when it’s done, so it can be displayed!

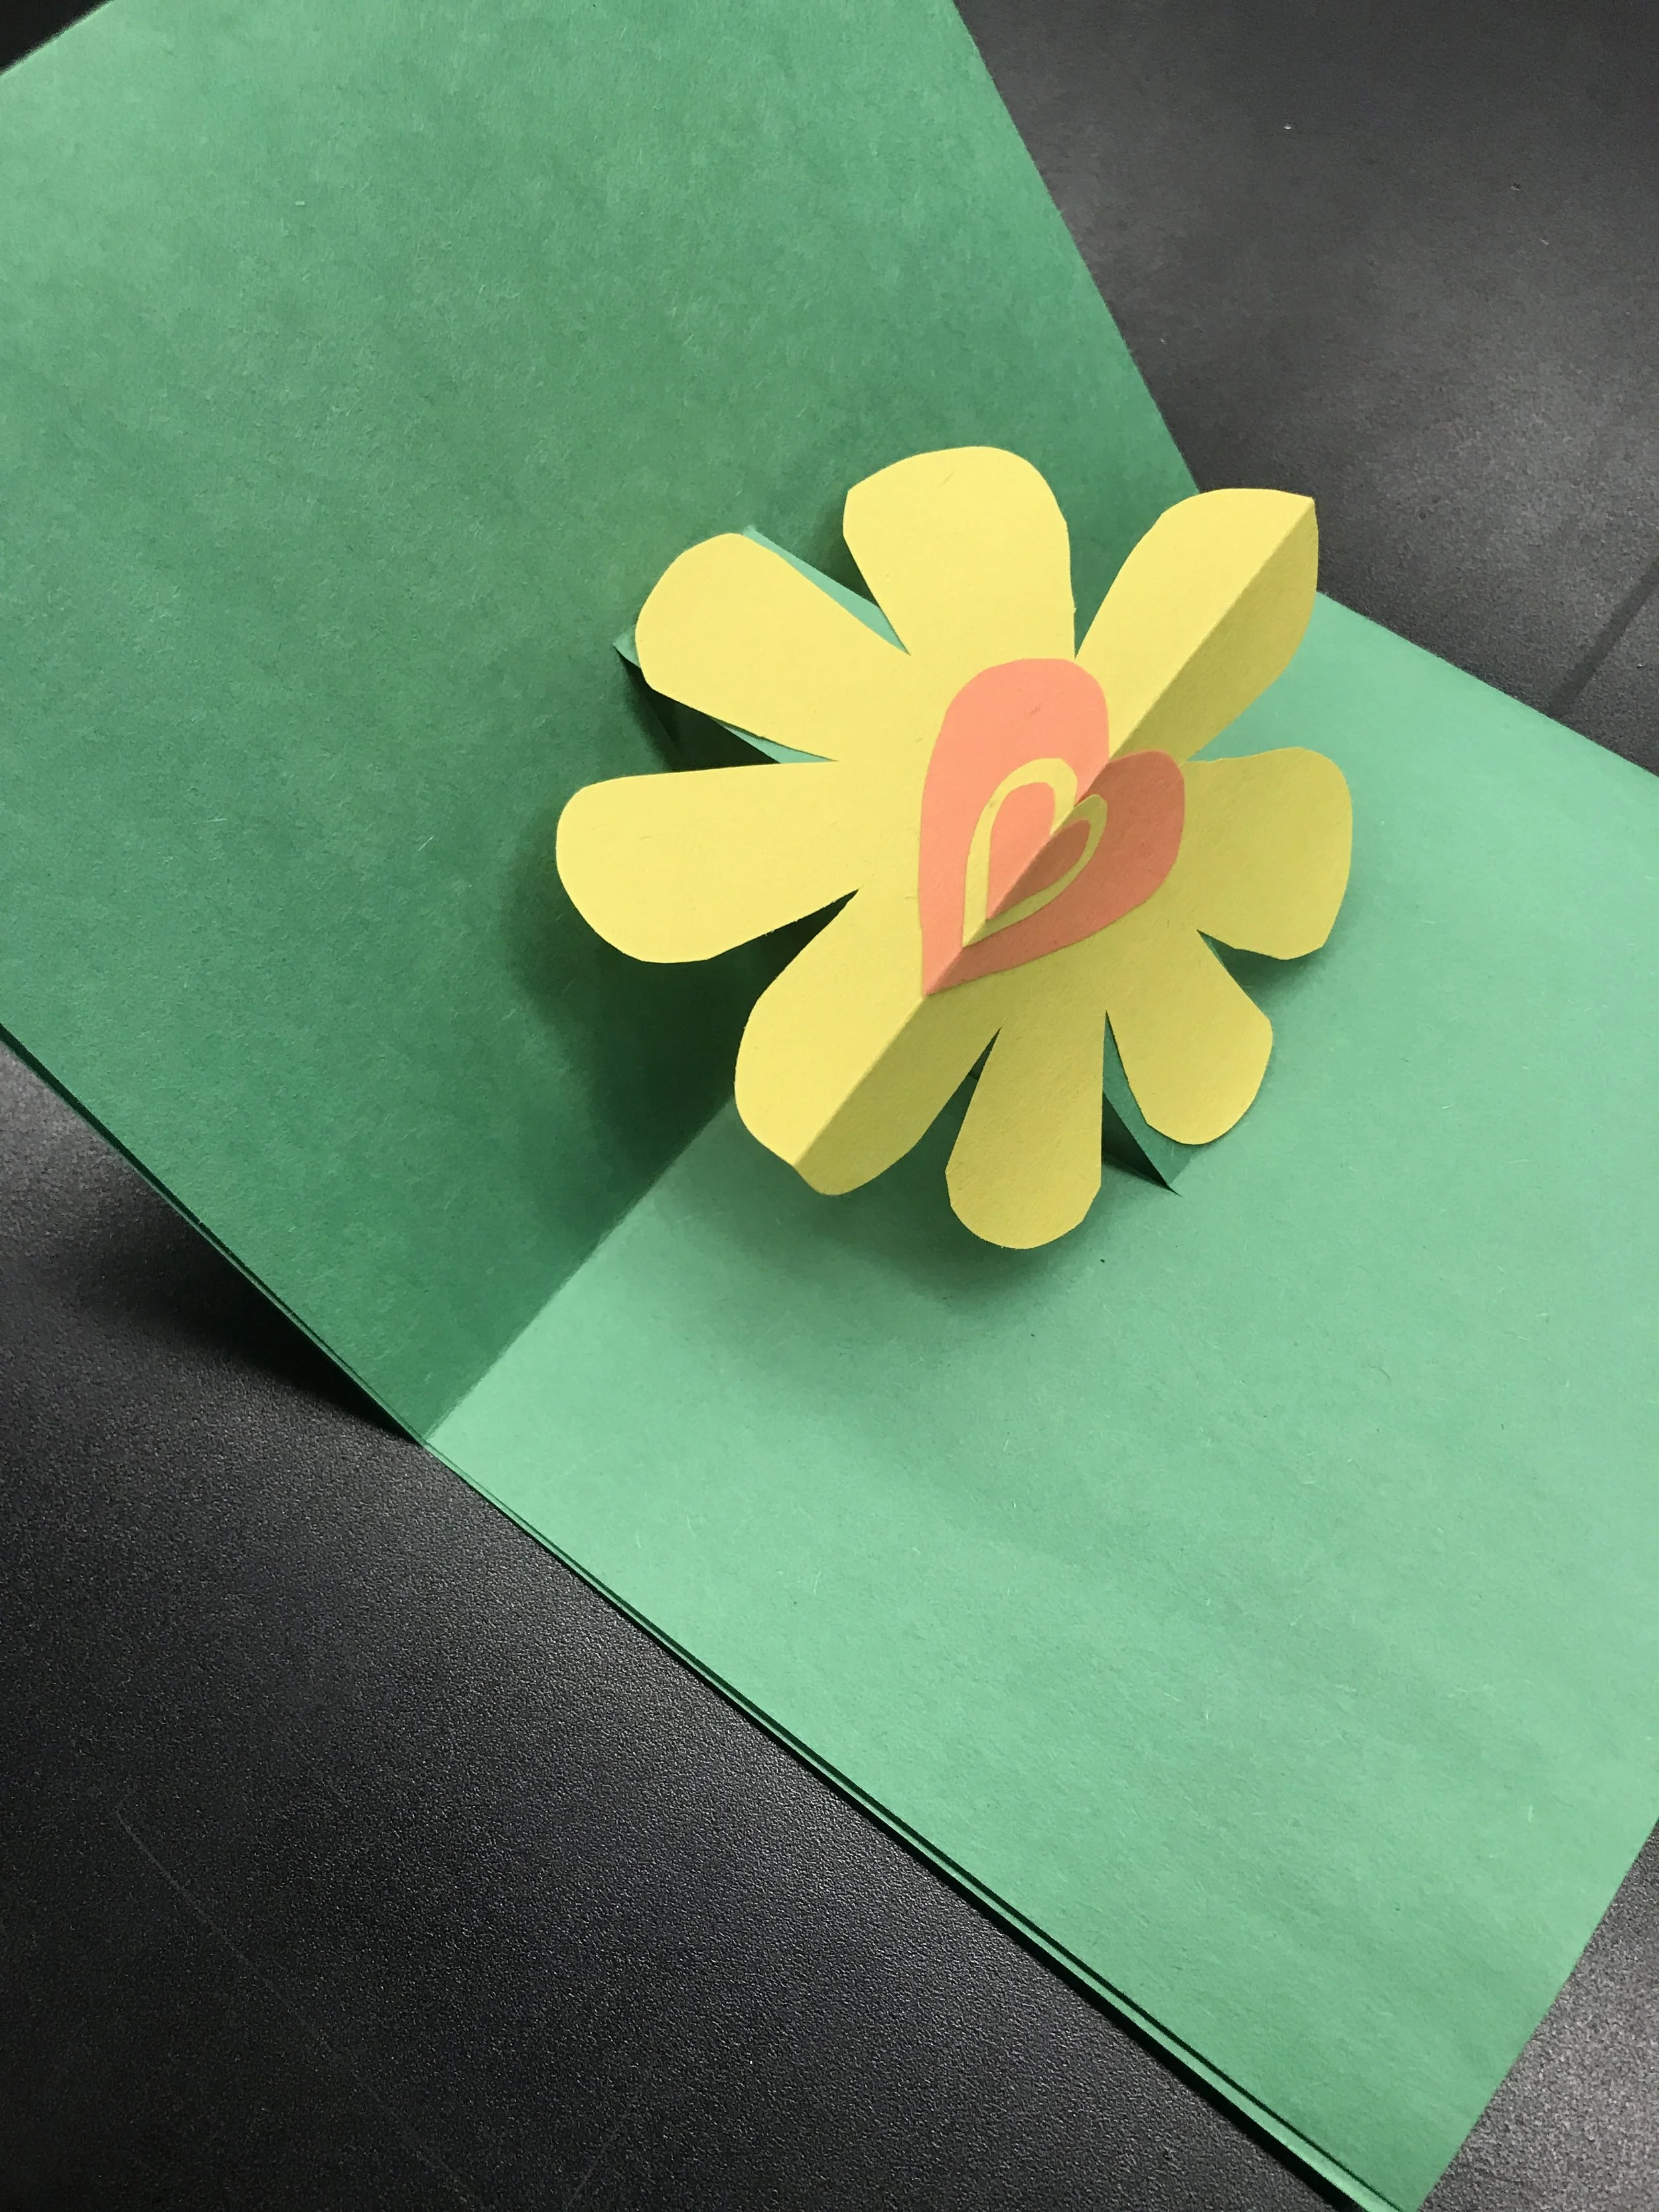
Step Six: On another sheet of paper, draw and cut out something to pop out of the card! It can be as simple as a heart, or something more elaborate like a superhero! If you need ideas, think about what the person the card is for would be most excited to see pop out.

Step Seven: Using your glue stick, apply a little glue to only the strip you cut, and stick your cut-out to the strip.

Step Eight: Pull the strip forward while closing the card, and when you open the card again it will pop out of the card!
Step Nine: Using your crayons and pencil or other decorative materials, write a note to the person your card is for, and decorate any way you want!

Keep Exploring
How could you make multiple pop-ups in one card?
What other occasions can you make pop-up cards for?
Don’t forget to give your card to the person you made it for! How did it make them feel to receive a handmade card from you?
Share your artwork with us by using @walkerartcenter and #walkerartcenter on social media. Check out #walkerartcenter to see what other families are making!